


joshmrallen
|
Complete Angela Yu Web Development ...
Star this Commitment
Day 7 of 7
joshmrallen commits to:
Complete the online bootcamp offered by Angela Yu on Udemy in 7 days. I'll spend 8 hours (at least) or more each day watching lectures, taking notes, and doing the assignments.
7
0
No more reports due
|
My Commitment Journal
 joshmrallen
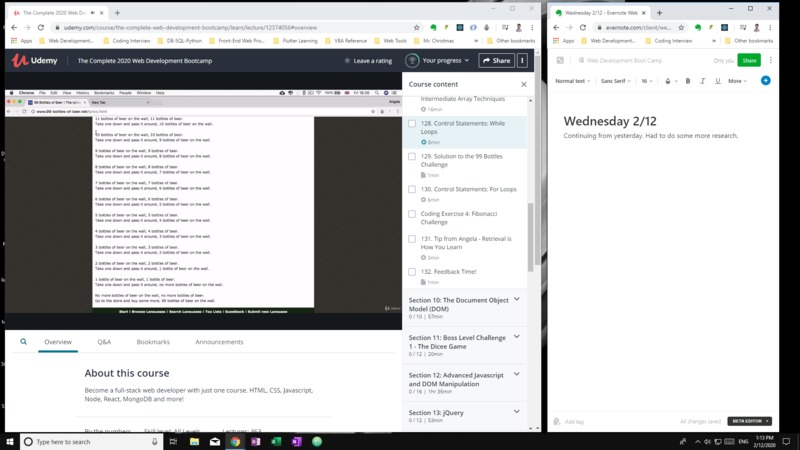
February 13, 2020, 5:59 AM
|
|
|
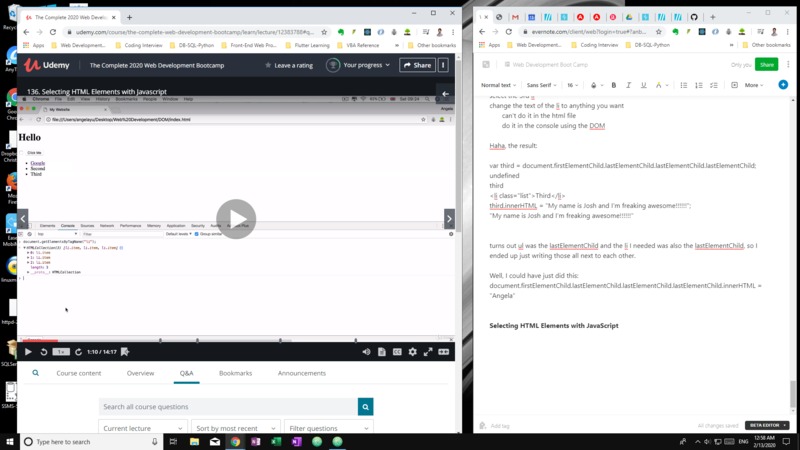
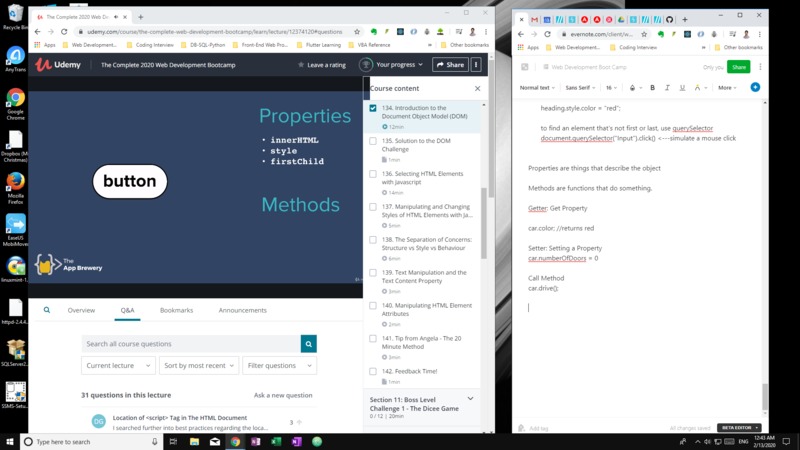
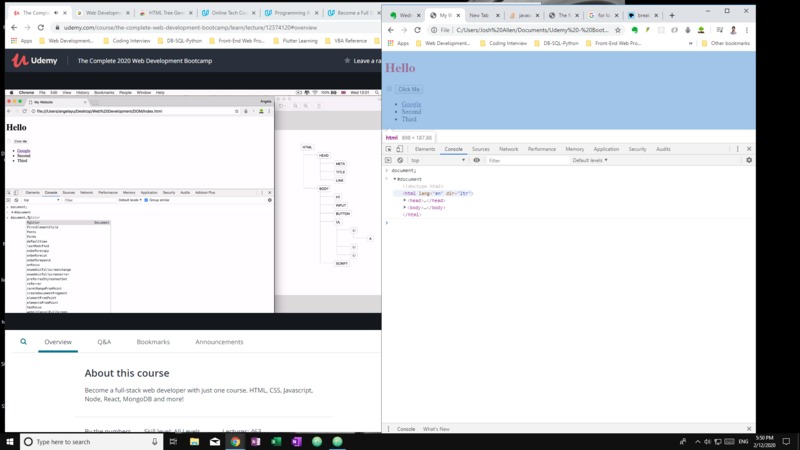
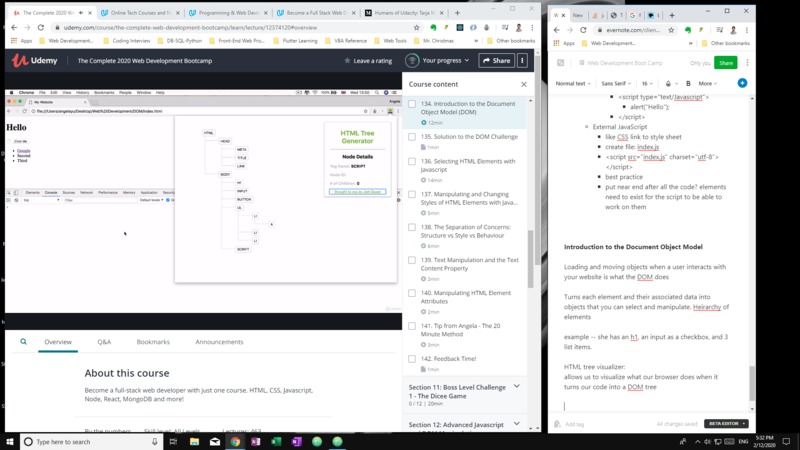
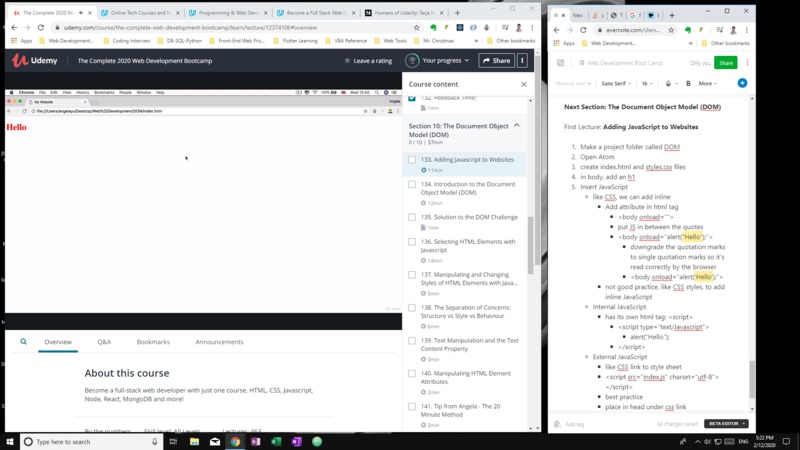
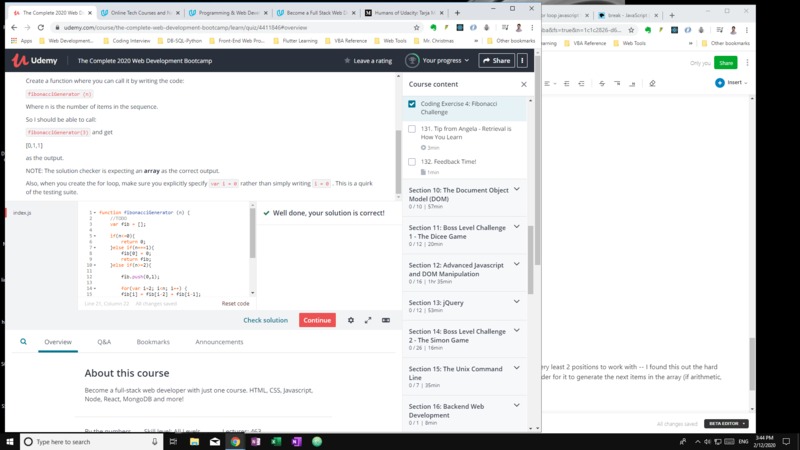
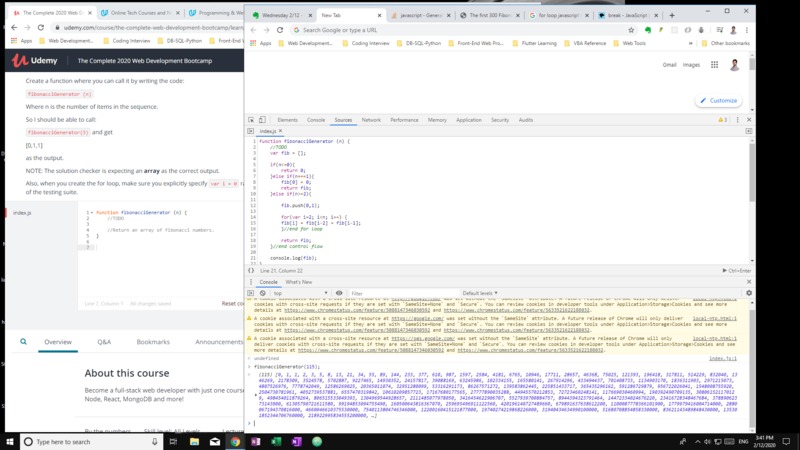
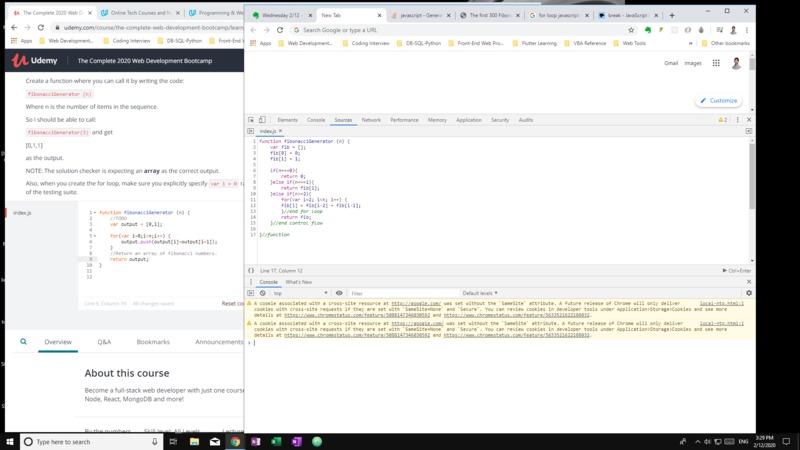
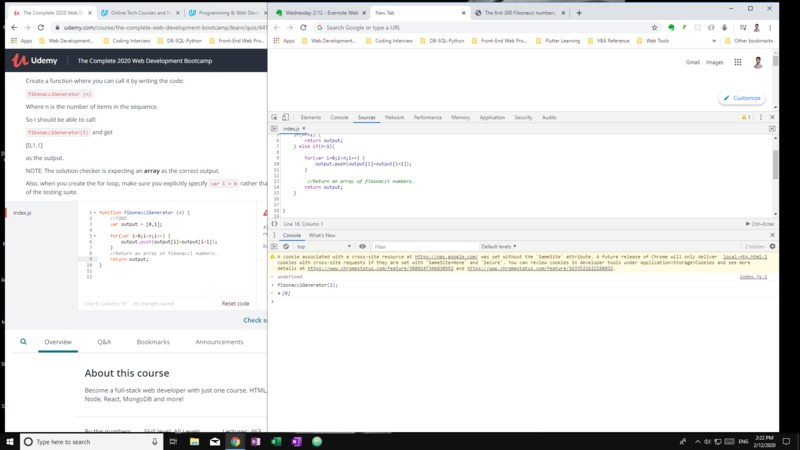
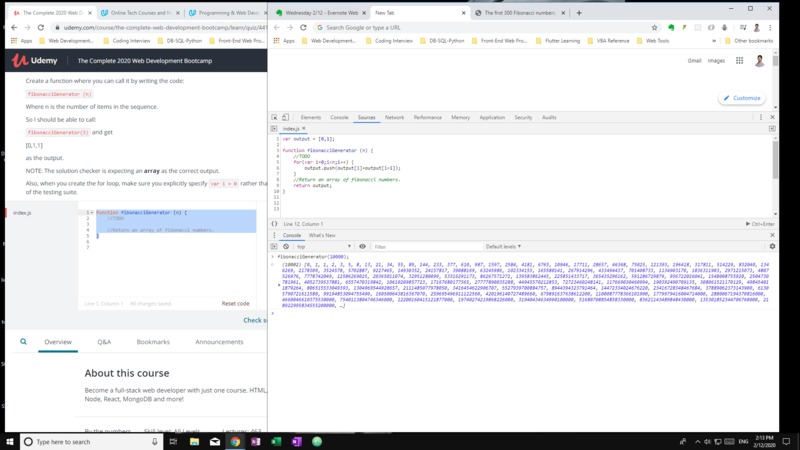
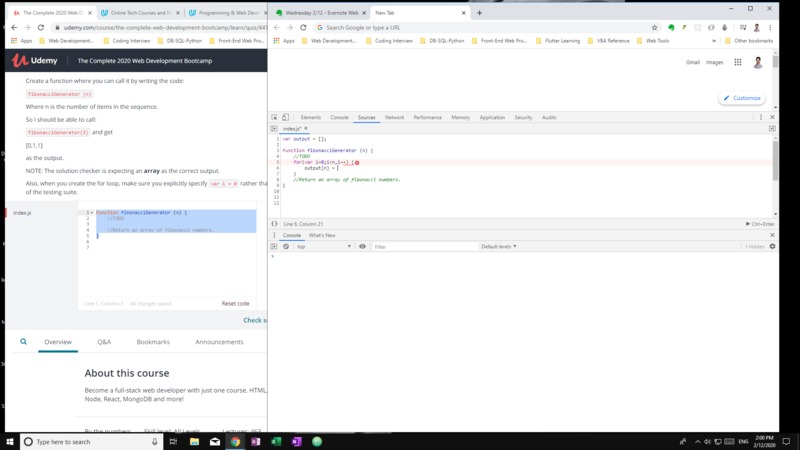
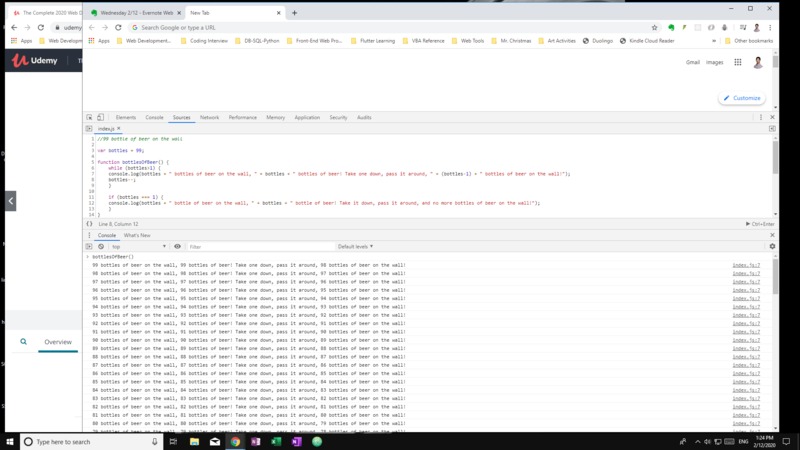
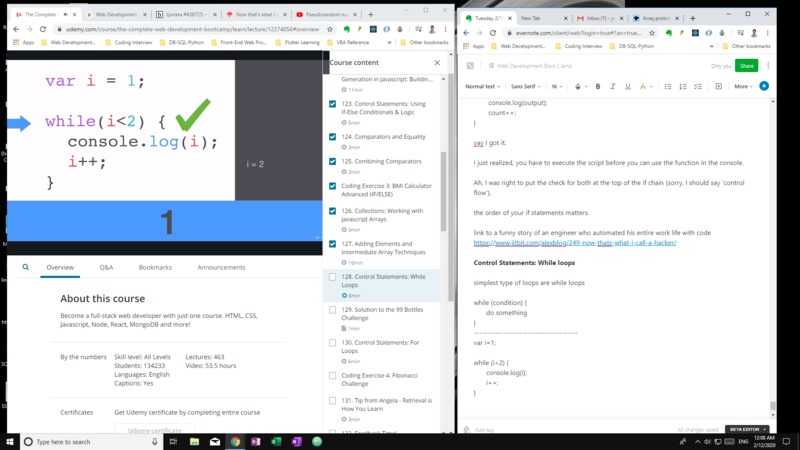
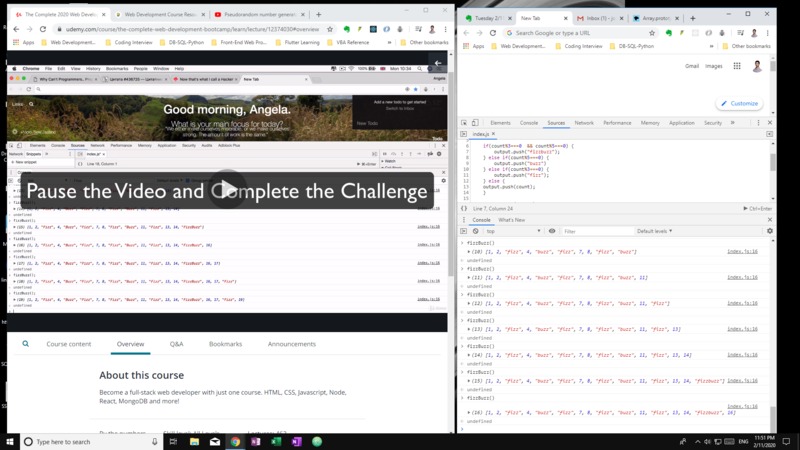
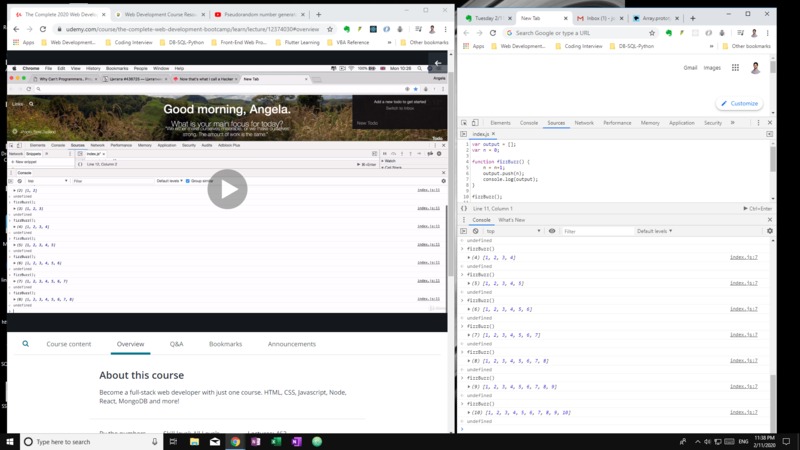
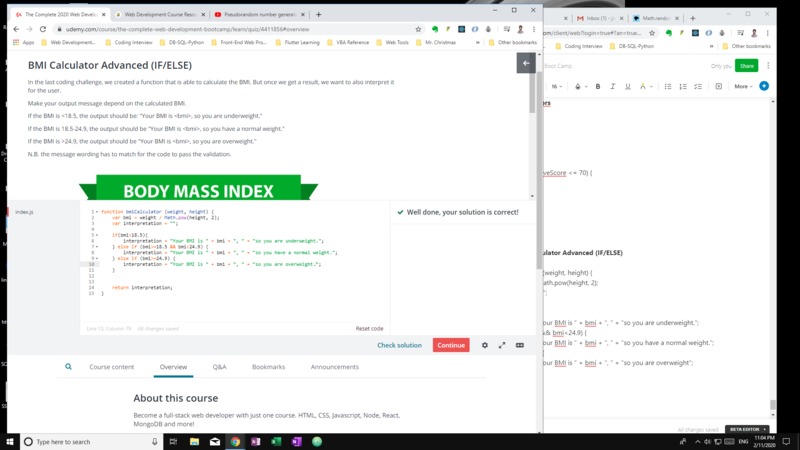
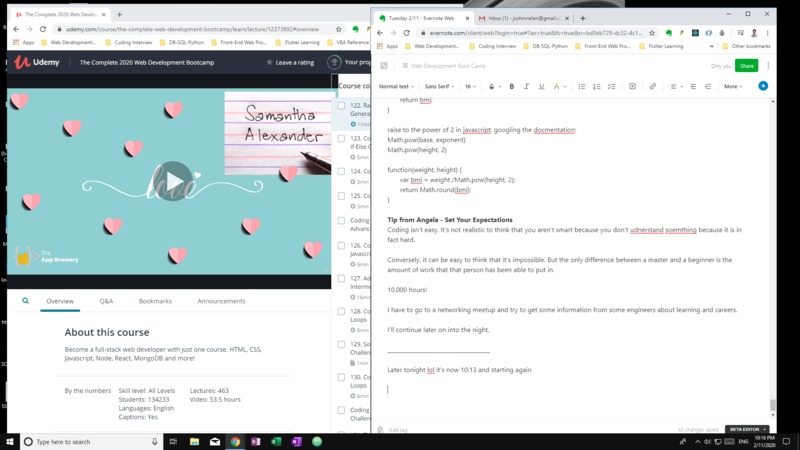
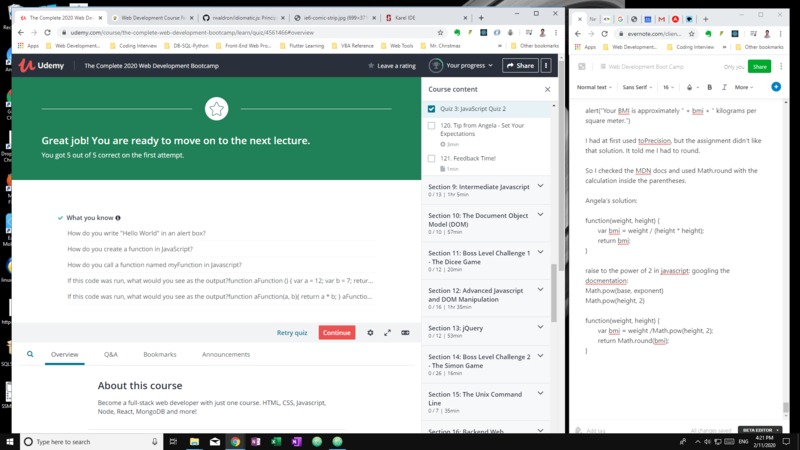
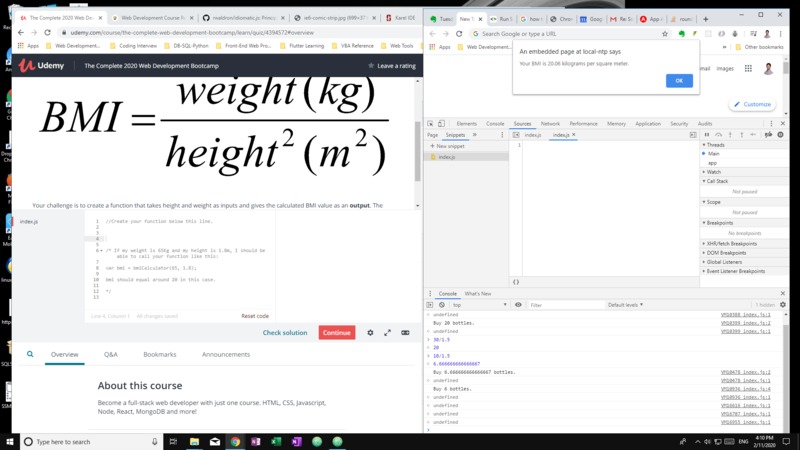
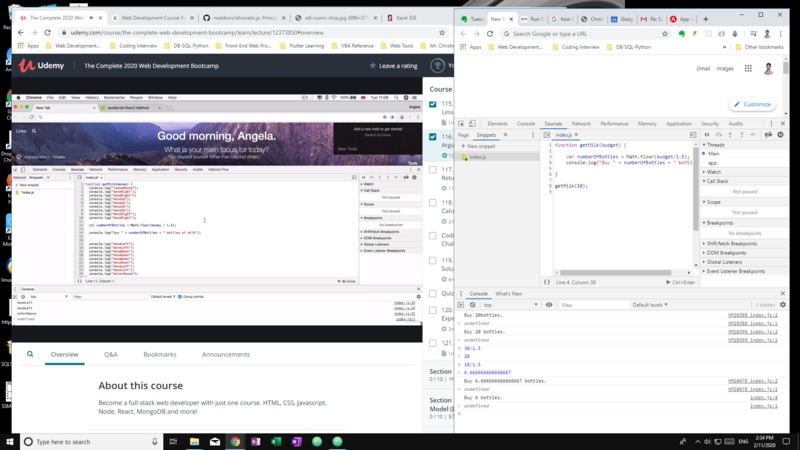
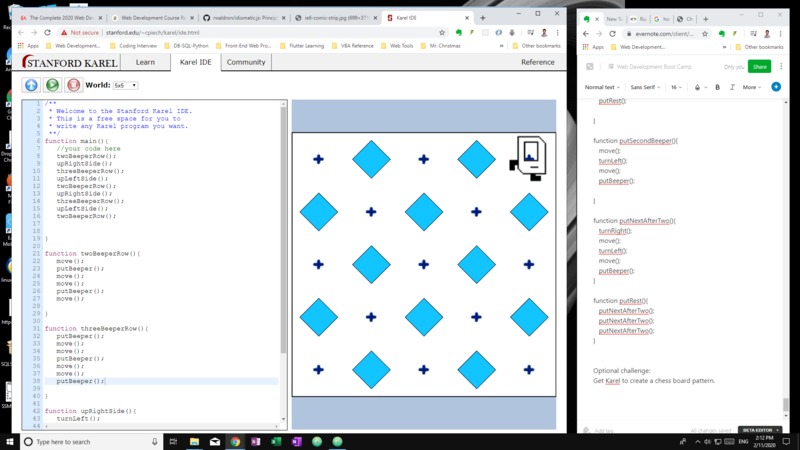
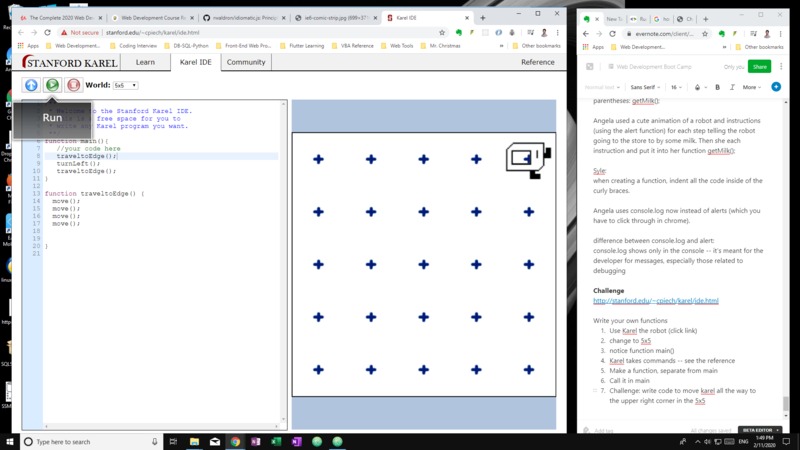
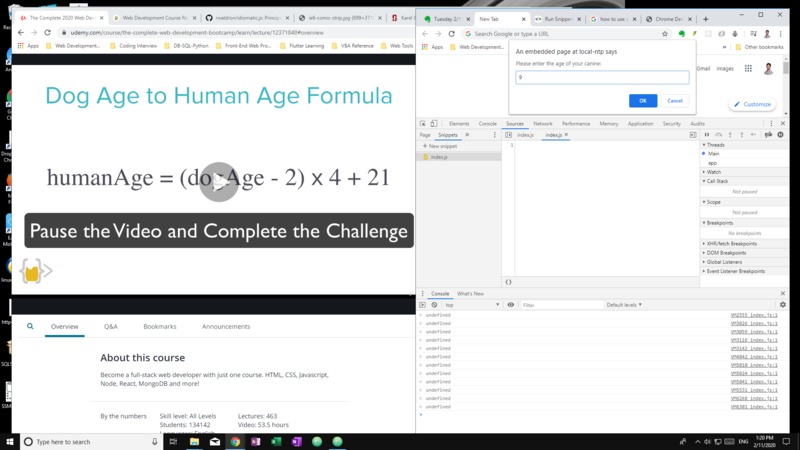
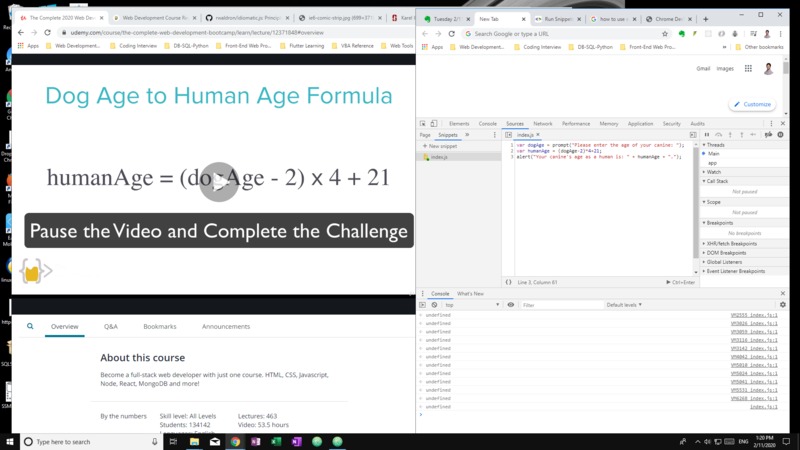
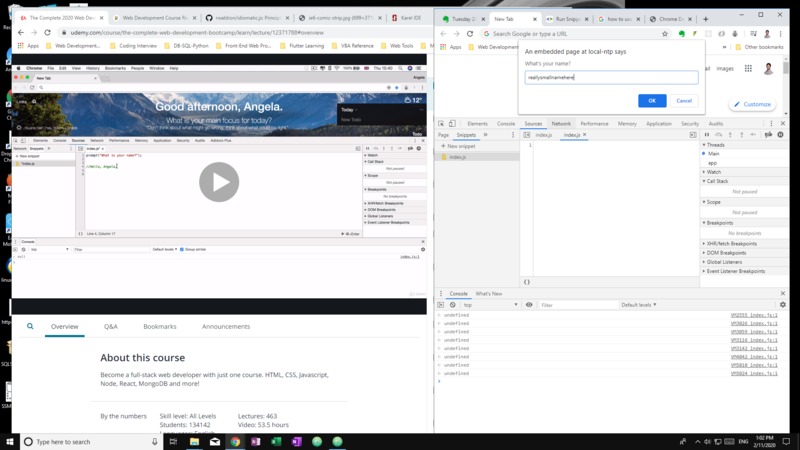
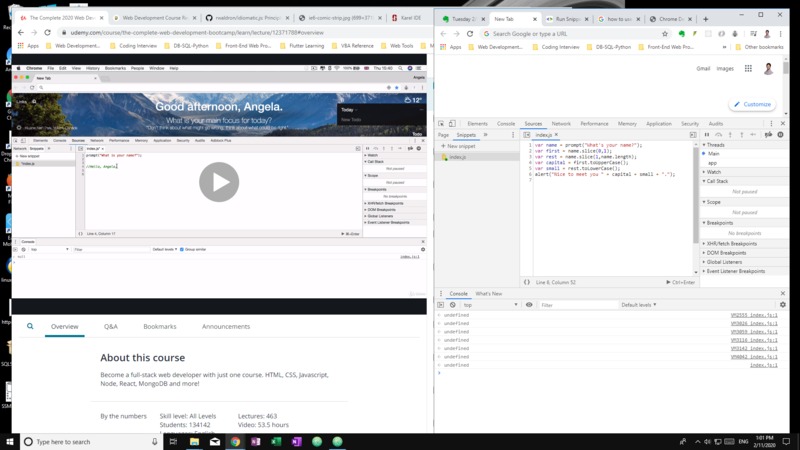
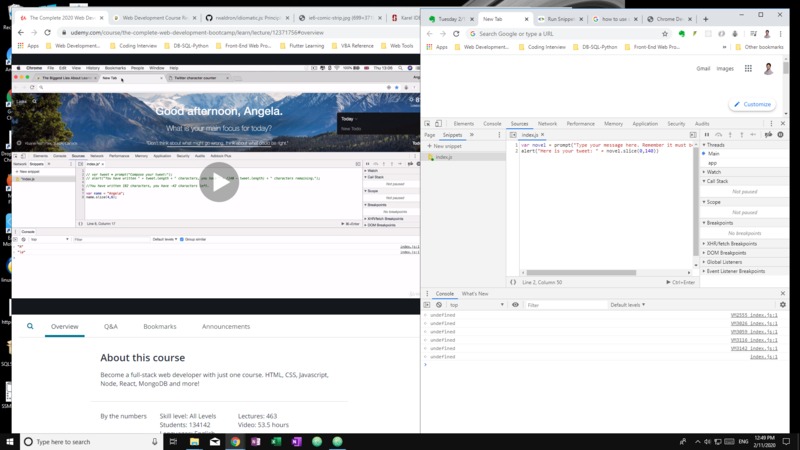
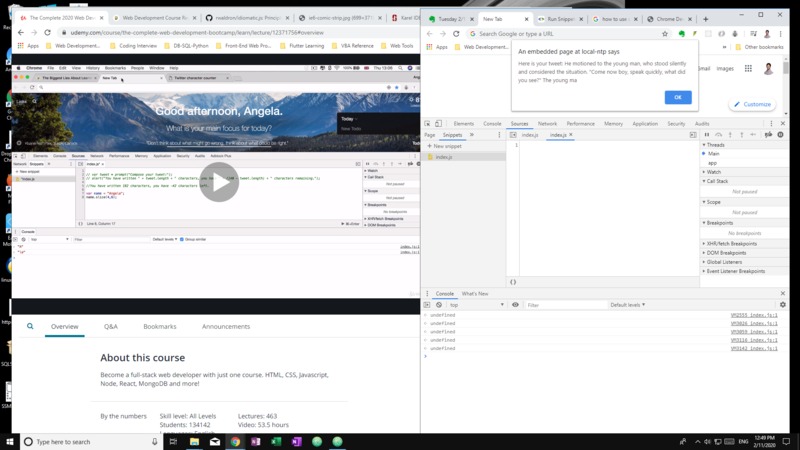
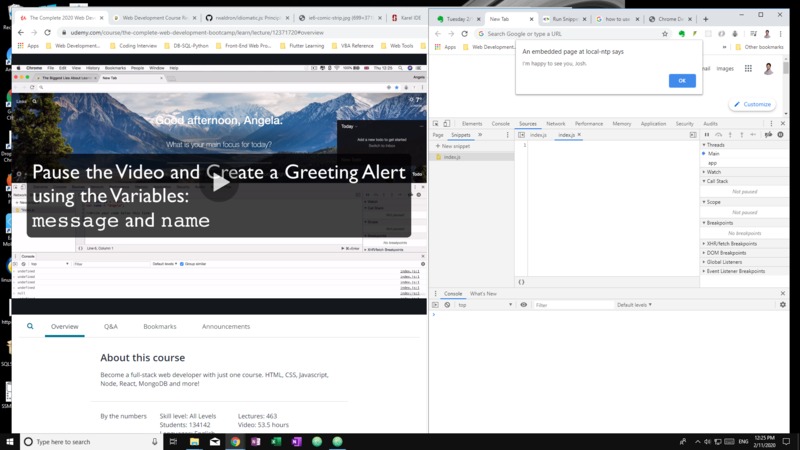
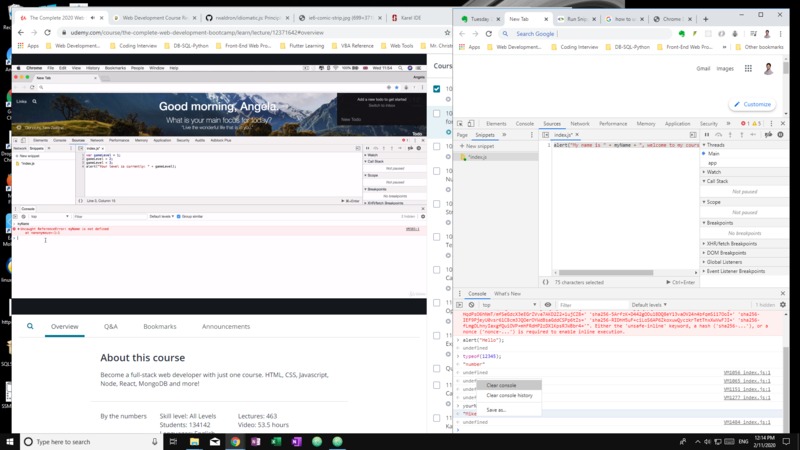
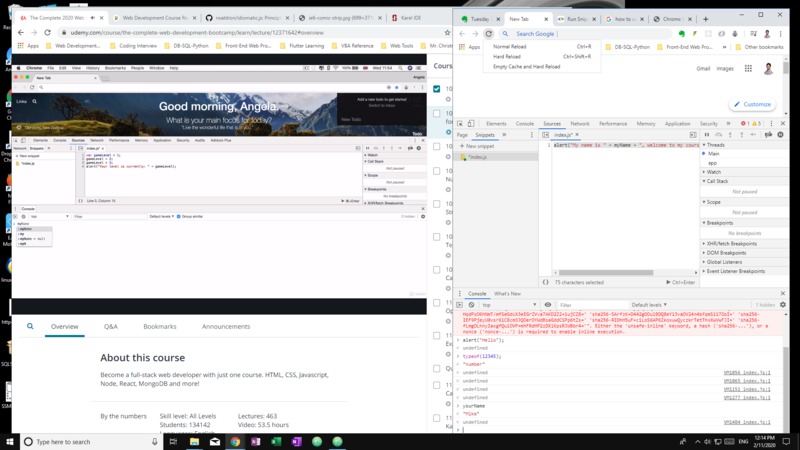
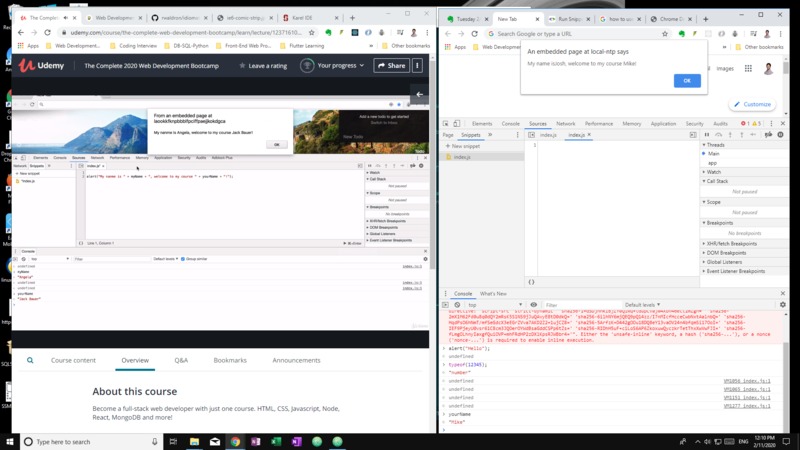
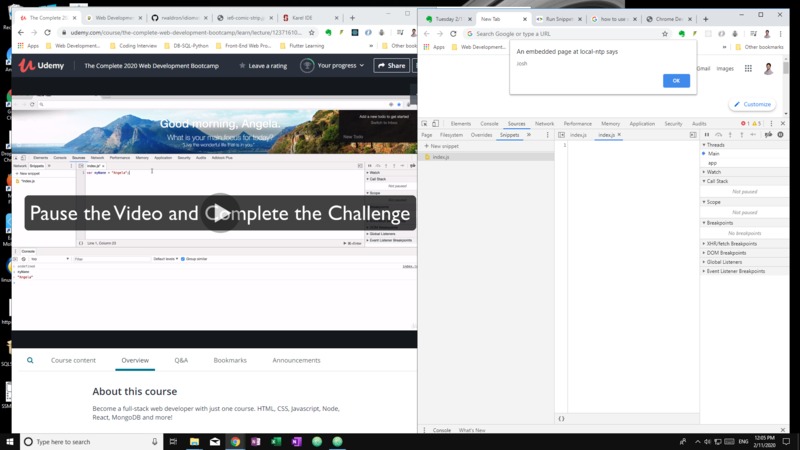
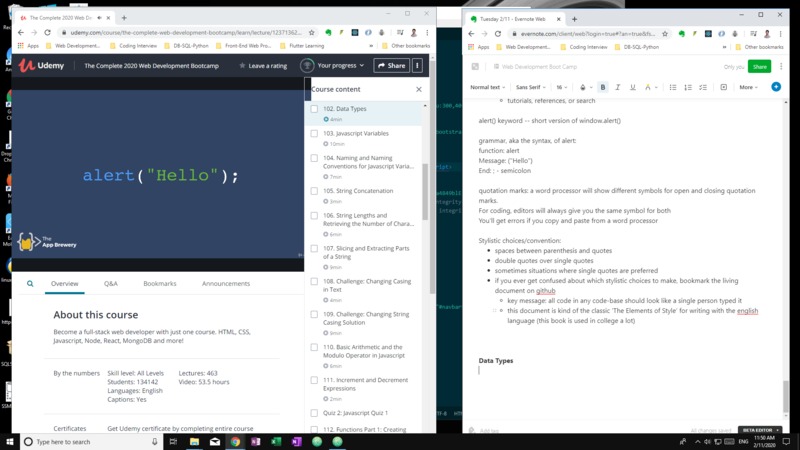
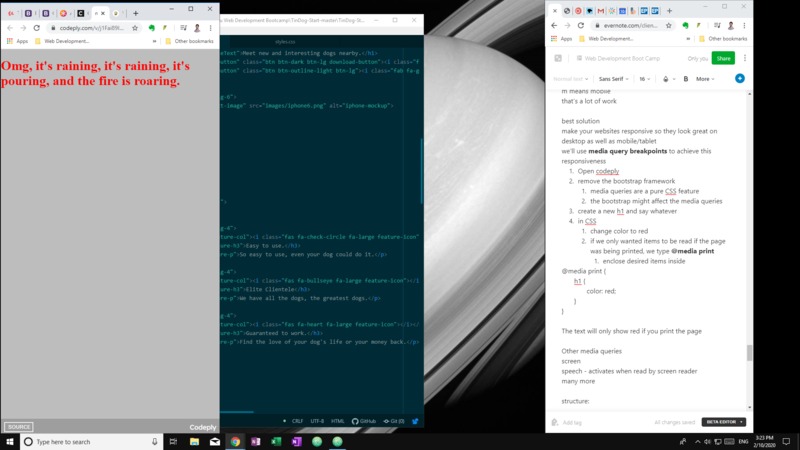
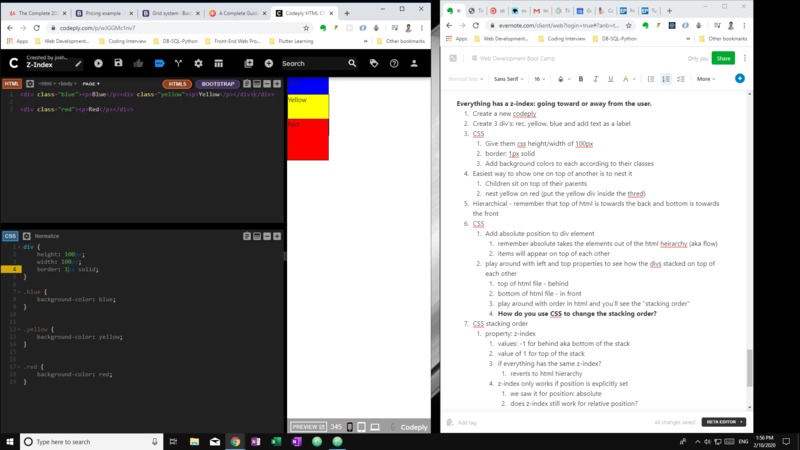
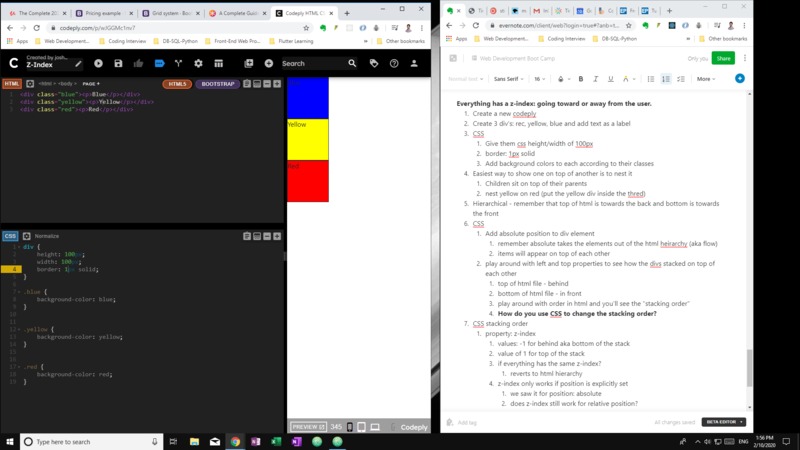
Continuing from yesterday. Had to do some more research. create a function in chrome snippets call it beer when you call it, print out all the lyrics of 99 bottles of beer on the wall yay, here's my solution: //99 bottle of beer on the wall var bottles = 99; function bottlesOfBeer() { while (bottles>1) { console.log(bottles + " bottles of beer on the wall, " + bottles + " bottles of beer! Take one down, pass it around, " + (bottles-1) + " bottles of beer on the wall!"); bottles--; } if (bottles === 1) { console.log(bottles + " bottle of beer on the wall, " + bottles + " bottle of beer! Take it down, pass it around, and no more bottles of beer on the wall!"); } } And here's Angela's solution: var numberOfBottles = 99 while (numberOfBottles >= 0) { var bottleWord = "bottle"; if (numberOfBottles === 1) { bottleWord = "bottles"; } console.log(numberOfBottles + " " + bottleWord + " of beer on the wall"); console.log(numberOfBottles + " " + bottleWord + " of beer,"); console.log("Take one down, pass it around,"); numberOfBottles--; console.log(numberOfBottles + " " + bottleWord + " of beer on the wall."); } and a futher challenge is to change bottleWord to bottles and the if statement to be bottle and then make it so it says "No more bottles of beer on the wall" when it gets to zero. I think I pretty much covered that in my version. Control Statements: For Loops variable goes into the for (), condition stays, and the change. it's what's called Syntactic Sugar in programming var i=1; while (i<2) { console.log(i); i++; } for (start; end; change) { //do something } for (i=0; i<2; i++) { //Do something } Syntactic Sugar: Sweetens up the language and makes things easier to write. fizzbuzz with a for loop: var output = []; function fizzBuzz() { for(var count = 1; count < 101; count++) { if(count%3===0 && count%5===0) { output.push("fizzbuzz"); } else if(count%3===0) { output.push("fizz") } else if(count%5===0) { output.push("buzz"); } else { output.push(count); }//if statements }//for loop console.log(output); }//function In which cases whould I use either: while checks for a state: while (something is true) { //do something } for (i=0;i<2;i++) { //do something } //for iteration also preference Fibonacci Challenge create a function where you can call the fibonacci sequence by calling the function with a parameter n where n is the number of items int he sequence. so fibonacciGenerator(3) would return [0,1,1] as the output. an array will be the correct output function fibonacciGenerator (n) { //TODO var output = [0,1]; for(var i=0;i<n;i++) { output.push(output[i]+output[i+1]); } //Return an array of fibonacci numbers. return output; } woo, it works. -- ooh, it didn't accept it because it wants it to be more dynamic in that if someone specifies n = 0 or n = 1, it wants a response. Well here we go: function fibonacciGenerator (n) { var fib = []; fib[0] = 0; fib[1] = 1; if(n<=0){ return 0; }else if(n===1){ return fib[1]; }else if(n>=2){ for(var i=2; i<n; i++) { fib[i] = fib[i-2] + fib[i-1]; }//end for loop return fib; }//end control flow }//function I had to use if statements and took a little peaking at the documentation. and I got tired of saying output so I used fib like one guy used for his solution on the web -- but this is not his solution. shoot, still doesn't work. Maybe now: function fibonacciGenerator (n) { //TODO var fib = []; if(n<=0){ return 0; }else if(n===1){ fib[0] = 0; return fib; }else if(n>=2){ fib.push(0,1); for(var i=2; i<n; i++) { fib[i] = fib[i-2] + fib[i-1]; }//end for loop return fib; }//end control flow console.log(fib); } I defined index 0 and index 1 when n is less than or equal 2 because the for loop needs at the very least 2 positions to work with -- I found this out the hard way -- this is good experience: sometimes for loops need to have initial values for an array in order for it to generate the next items in the array (if arithmetic, etc). Yay, I got it right. only took me almost 2 hours to come to terms with the above fact I just stated. Tip from Angela: Retrieval is how you learn "When I'm watching the tutorials, everything makes sense, but when I get down to do it myself, it's I know nothing at all." Angela, being a former neuroscience researcher, explains the process. - As much as you can, look up exercises around the internet. - Go to that code interview website and practice problems on there - Google JS programming exercises and do a bunch - Test yourself on items. - Anticipate what the tutorial is going to be and do it first before the instructor does it. If we're not using the skills we're learning, it's like we haven't learned that at all. Next Section: The Document Object Model (DOM) First Lecture: Adding JavaScript to Websites 1. Make a project folder called DOM 2. Open Atom 3. create index.html and styles.css files 4. in body, add an h1 5. Insert JavaScript - like CSS, we can add inline - Add attribute in html tag - <body onload=""> - put JS in between the quotes - <body onload="alert("Hello");"> - downgrade the quotation marks to single quotation marks so it's read correctly by the browser - <body onload="alert('Hello');"> - not good practice, like CSS styles, to add inline JavaScript - Internal JavaScript - has its own html tag: <script> - <script type="text/Javascript"> - alert("Hello"); - </script> - External JavaScript - like CSS link to style sheet - create file: index.js - <script src="index.js" charset="utf-8"></script> - best practice - put near end after all the code? elements need to exist for the script to be able to work on them Introduction to the Document Object Model Loading and moving objects when a user interacts with your website is what the DOM does Turns each element and their associated data into objects that you can select and manipulate. Heirarchy of elements example -- she has an h1, an input as a checkbox, and 3 list items. HTML tree visualizer: allows us to visualize what our browser does when it turns our code into a DOM tree inspect page: search first.ElementChild, lastElement in console: document.firstElementChild.lastElementChild.firstElementChild; this code selects the h1 in her example var heading = document.firstElementChild.lastElementChild.firstElementChild; heading.innerHTML = "Good Bye"; heading.style.color = "red"; document.querySelector("input").click(); //simulates a mouse click! Each Object in the DOM has: - Properties - identify with a period - car.color; //red - get property - can also set properties - car.numberOfDoors = 4; - different from getting because you just use an equal sign to assign the value - Methods - car.drive(); - a method is something that an object can do - basically a function tell the difference: methods are essentially functions that an object can do, so they have parentheses All that you need to know if that you can access properties and methods through dot notation Oh, so you go the page, then you open console. Type document; and hit enter you'll be able to expand and see everything included in the DOM. I thought it was weird that you have to type the same name over again, but firstElementChild is just what something is -- it's a child, it's more vague. so children have children which have children. This is just narrowing down through the DOM tree. so, selecting the head: document.firstElementChild.firstElementChild; and then selecting other items in that element. is there a secondElementChild? no, but there is lastElementChild. I think ElementChild's are elements that contain other children. but why was I able to select meta with firstElementChild and not the elements in head? how do you select the other elements and not just the first or the last? You can manipulate the item you've selected inside the DOM: declate it in a variable: var heading = document.firstElementChild.lastElementChild.firstElementChild then call it: heading and it'll select the h1 for you, which currently just says Hello. using dot notation with the keyword 'innerHTML', you can change the contents of that h1: heading.innerHTML = "Good Bye"; we can do this to change our website on the fly heading.style.color = "red"; to find an element that's not first or last, use querySelector document.querySelector("Input").click() <---simulate a mouse click Properties are things that describe the object Methods are functions that do something. Getter: Get Property car.color; //returns red Setter: Setting a Property car.numberOfDoors = 0 Call Method car.drive(); DOM Challenge use the resources to download the challenge select the 3rd li change the text of the li to anything you want can't do it in the html file do it in the console using the DOM Haha, the result: var third = document.firstElementChild.lastElementChild.lastElementChild.lastElementChild; undefined third <li class="list">Third</li> third.innerHTML = "My name is Josh and I'm freaking awesome!!!!!!"; "My name is Josh and I'm freaking awesome!!!!!!" turns out ul was the lastElementChild and the li I needed was also the lastElementChild, so I ended up just writing those all next to each other. Well, I could have just did this: document.firstElementChild.lastElementChild.lastElementChild.lastElementChild.innerHTML = "Angela" Selecting HTML Elements with JavaScript Continuing on in the commitment. |
|
|
|
|


|
joshmrallen
February 12, 2020, 1:43 PM
|
|
|
Once this particular commitment is done, I'm scheduling another one that end in 18 days which should be enough time to finish it. I drastically mis-calculated the length of time I'd need to go through this entire online course. But it's been extremely enlightening so far and I'll definitely be able to complete it in another 2 weeks or so. |
|
|
joshmrallen
February 12, 2020, 1:37 PM
|
|
|
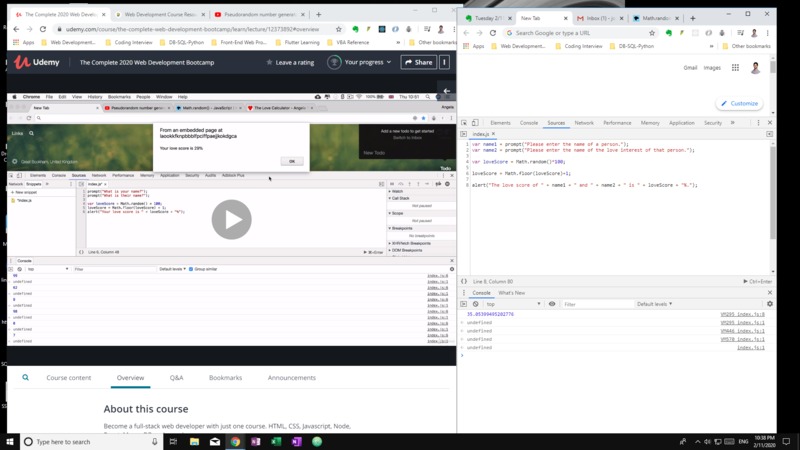
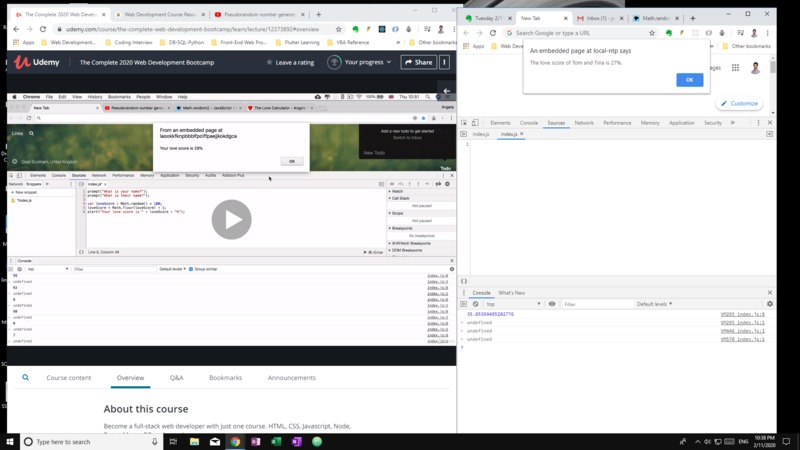
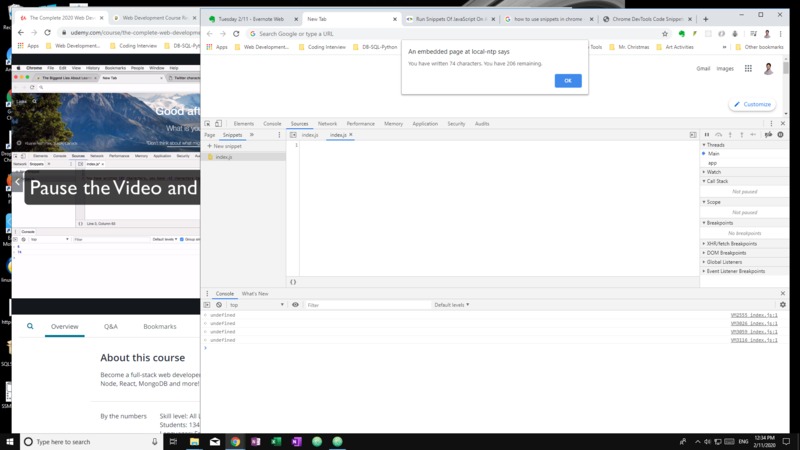
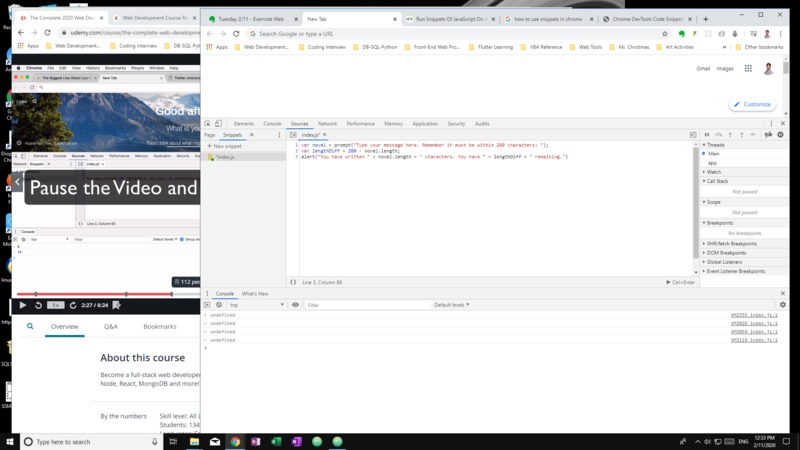
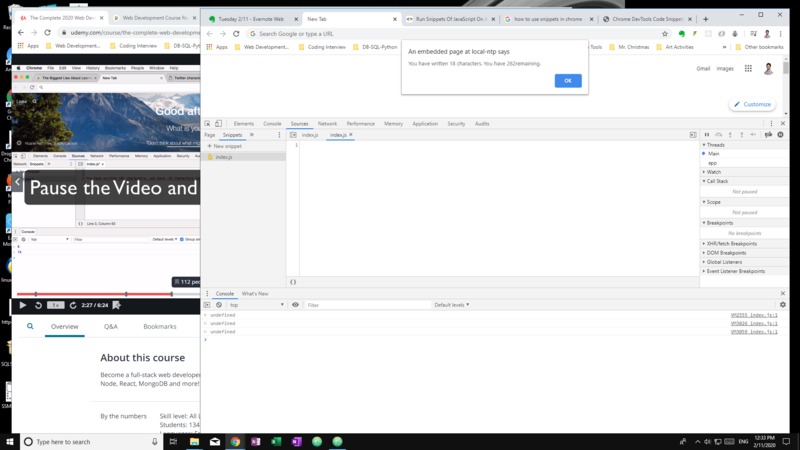
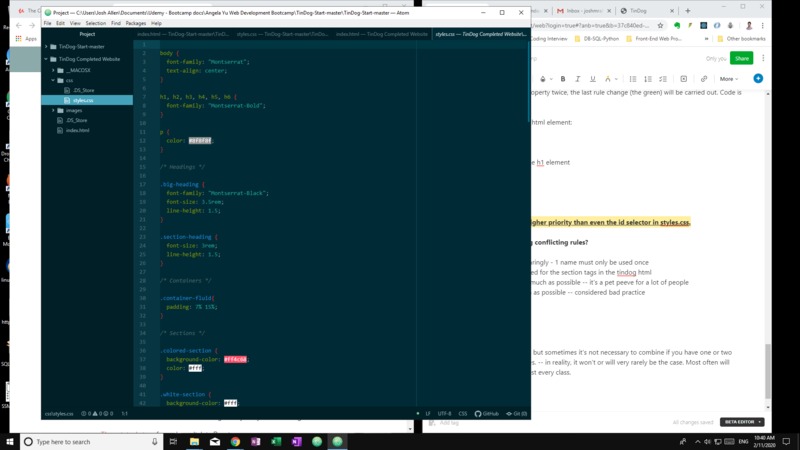
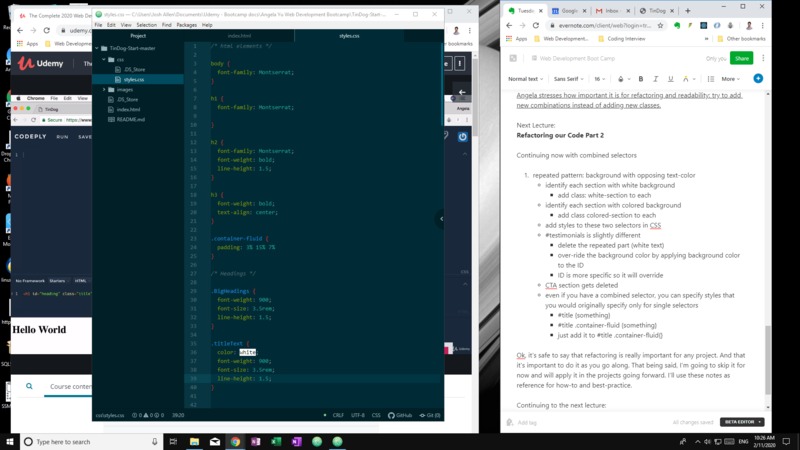
Here's my report for Tuesday: Starting a bit later -- I'll have to make up this time later this evening. Especially since I have to go to a meetup tonight and do some networking. Reviewing all the parts about refactoring: Put it into Practice - Refactor our Website Part 1 1. keep all html selectors together (regular bold, h1, etc) 2. Notice which is doing specific things 1. don't apply to h1, rather to specific class - call it BigHeadings 2. add a class to h1 called big-heading 3. create section Headings in css file and put this h1's styles there. 3. All headings have same font, etc. 1. multiple selectors: h1, h2, h3, h4, h5, h6 { font-family: "Montserrat-Bold"; } 1. h2 styles 1. give h2's specific classes: 2. .price-text, font-size: 3rem, line-height: 1.5; 3. .big-heading, same 2. h3 styles 1. add .feature-title, for font-size 3. cta-heading turns out to be the same as .big-heading 1. add .big-heading to cta heading 4. text-align: center --ctrl f shows we used it 7 times 1. best to make the entire body text-align: center 2. But keep the one inside the media query 5. Regularly save and refresh and check that nothing changed 6. padding: 7% 15% --- used 4 times 1. change to .container-fluid 2. add container-fluid class to each item we used that padding for 1. don't even have to overwrite, just append it inside the quotes after what's already there. 2. delete all the extra stylings 3. pushes down our navbar 1. inspect 2. what should we do? 1. combine styles 2. make .container-fluid to have padding: 3% 15% 7% but also target the #title .container-fluid { padding: 3% 15% 7%; } Best way is to refactor as you go along so you don't have to have a huge refactoring session later. Next lecture: Advanced CSS - Combining Selectors Pick & Mix Selectors 1. Multiple Selectors - combine selectors using a comma (don't need a space but helps with readability) - h1, h2, p {color: red;} - most common for html elements 2. Hierarchical Selectors - selector1 selector2 {} - #title .container-fluid {} - targeted the .container-fluid class that's inside a div with id #title - spacing is important, different with the multiple selectors - read right to left - very important -- parent child {} - div h1 {} - h1 that's inside of a div (too broad though) - so we use the class name - more common: .container-fluid h1 {} - onlythe h1's within the parent with class container-fluid 3. Combined Selectors - no spaces - selector1.selector2 {} - selector1#selector2 {} - h1#title {} - have to occur in the same element - left to right - does not work: div#title {} - what's the difference? - open codeply 1. no bootstrap framework <div class="container"> <h1 id="heading" class="title">Hello world!</h1> </div> <div class>"container-fluid"> <h1 class=>"Good Bye World!</h1> </div> .container .title { color: red; } this colors only Hello World red if you delete the space, it's looking for both classes in the same element .container.title {} with no space doesn't work h1#heading {} targets all of the h1's that have #heading h1.title {} targets all the h1's that have a class title (will affect both hello and goodbye) Angela stresses how important it is for refactoring and readability: try to add new combinations instead of adding new classes. Next Lecture: Refactoring our Code Part 2 Continuing now with combined selectors 1. repeated pattern: background with opposing text-color - identify each section with white background - add class: white-section to each - identify each section with colored background - add class colored-section to each - add styles to these two selectors in CSS - #testimonials is slightly different - delete the repeated part (white text) - over-ride the background color by applying background color to the ID - ID is more specific so it will override - CTA section gets deleted - even if you have a combined selector, you can specify styles that you would originally specify only for single selectors - #title {something} - #title .container-fluid {something} - just add it to #title .container-fluid{} Ok, it's safe to say that refactoring is really important for any project. And that it's important to do it as you go along. That being said, I'm going to skip it for now and will apply it in the projects going forward. I'll use these notes as reference for how-to and best-practice. Continuing to the next lecture: Advanced CSS - Selector Priority I think Angela's starting to get tired by this point because she didn't give much of an intro here, granted it's a short lecture video. In codeply, she gives an example of color: h1 { color: red; color: green; } html elements have the lowest priority I you try to change the same property twice, the last rule change (the green) will be carried out. Code is being read top to bottom. A class is more specific than an html element: .title { color: yellow; } this has higher priority than the h1 element #heading { color: blue; } this has the highest priority inline CSS style-"" has even higher priority than even the id selector in styles.css. How can you prevent creating conflicting rules? - use ID's only very very sparingly - 1 name must only be used once - e.g., ID's were only used for the section tags in the tindog html - multiple classes: avoid as much as possible -- it's a pet peeve for a lot of people - inline style: avoid as much as possible -- considered bad practice Next lecture: Completing the Website Refactoring: -it's great to combine selectors, but sometimes it's not necessary to combine if you have one or two classes that have the same styles. -- in reality, it won't or will very rarely be the case. Most often will choose different styles for almost every class. Oh, I caught a mistake I had made. She centered the entire section for the media query, where I just centered the text only. Makes sense. Oh wow and that fixed my menu problem of it coming up on the left side instead of the center like hers. Oh man, what happened to my font awesomes? they all disappeared! <script defer src="https://use.fontawesome.com/releases/v5.0.7/js/all.js"></script> <script src="https://kit.fontawesome.com/2356c19003.js" crossorigin="anonymous"></script> I added my own kit code to angela's complete version. icons didn't work. I opened up firefox and they worked fine. there's some sort of bug with chrome that I think this article on stack overflow mentioned -- ah nevermind, they're working now. It was an issue on stack overflow's side. Next Lecture: Tip from Angela - Building a Programming Habit - Tag your new habit on the end of an existing habit. - "every morning after I brush my teeth, I'm going to meditate." - brushing her teeth became a trigger for meditating _________________________________________________________________________________________ Next Section: Introduction to Javascript ES6 First Lecture: Introduction to Javascript Netscape - people who recognize it are over 30 Andreesen Horowitz -- Mark Andreesen Mosaic - a browser Mark worked on in college mark worked on Netscape after college browser wars - IE vs Netscape Netscape died tech incorporated into Firefox 1995 - HTML all form, no function Netscape wanted something different. existing system had server sending functionality to the user's browser. They wanted to take away the server and have the code run on the browser. Code had to be easy, so non-programmers could use it to add functionality to websites. Brendan Eich - contracted by netscape to create this language. Made JavaScript in 10 days. Turn off JS in your browser and see what happens. go to twitter and it'll go straight to the mobile version which doesn't use JS. writing a tweet misses functionality of character limit Viewing New york Times w/o JS: ads won't load YouTube won't load Brendan Eich first called it LiveScript. Microsoft called it JScript Europeans tried to standardize it and called it ECMAScript (you can see versions called ES 5 or ES 6) What does 'script' mean? Like a script in a theatrical play Java vs JavaScript What's their relationship? Java and JavaScript have has much in common as car and carpit -- in 90's, the word Java was extremely popular for some reason. Java is a compiled language JavaScript is an interpreted language Interpreted "like toy languages" line by line slow Compiled "serious" fast Literally Supported by every browser Most popular language of 2018 was still JavaScript. Which language should I learn? iOS: swift build android app: Java Websites/Web-Apps: JavaScript -- best friend and worst enemy Next lecture Javascript alerts -- adding behavior to websites - Open new tab in chrome - Open console: view, developer, javascript - Write: - alert("Hello"); - hit enter - brings up a popup with the "hello" alert. click ok and popup disappears - Downside of console - muliple alerts, aka a multi-line instruction, won't be executed - hold down shift to add more lines - Another way to write code without this - Click on 'Sources' - Right arrow, click 'Snippets" - Click 'New Snippet' - call it index.js - Now you can write JavaScript like you do in Atom - Then push the play button in the bottom right-hand corner - We'll be using the Snippets editor in the next few lessons - Which instructions are ignored? - fake commands - crash the console and reports error - MDN Documentation - JavaScript - tutorials, references, or search alert() keyword -- short version of window.alert() grammar, aka the syntax, of alert: function: alert Message: ("Hello") End: ; - semicolon quotation marks: a word processor will show different symbols for open and closing quotation marks. For coding, editors will always give you the same symbol for both You'll get errors if you copy and paste from a word processor Stylistic choices/convention: - spaces between parenthesis and quotes - double quotes over single quotes - sometimes situations where single quotes are preferred - if you ever get confused about which stylistic choices to make, bookmark the living document on github - https://github.com/rwaldron/idiomatic.js - key message: all code in any code-base should look like a single person typed it - this document is kind of the classic 'The Elements of Style' for writing with the english language (this book is used in college a lot) Data Types - string - called because it's a string of characters - not interpreted as code - numbers - boolean - true - false typeof() function - tells you the data type of something in chrome javascript console, add numbers alert(2+3); JavaScript Variables prompt("What is your name?"); box opens up and has a field for you to type text in and press ok How do we have chrome remember what we type? var myName = "Angela"; Keyword: var Name: (the name of the variable) Value: "Angela" Angela presents a nice animation where the variable is a box/container and the value is the contents of that container. once you've created a variable with var, you don't need to use it ever again. Had to minimize one part of the sources to get the arrow menu which had Snippets on it. Also didn't realize I could have the console on the bottom at the same time as having the snippet area up. var myName = "Josh"; var yourName = prompt("What is your name"); alert("My name is " + myName + ", welcome to my course " + yourName + "!"); Naming and Naming Conventions for JavaScript Variables clear the console, ctrl+k (doesn't delete variables) or right click and choose clear console to erase data (variables, etc), right-click on the reload button and choose "clear cache and hard reload" - give every variable a different name - can't use javascript keywords as a variable name - but you could combine: myvar - no spaces - spaces are read as separate - only letters, numbers, dollar sign ($), or underscore (_) - no dash (-) - camel casing - thisIsGoodPractice - TherapistFinder.com - easier to read and less frightening than therapistfinder.com Strings Concatenation combine strings using the plus sign (+) "a" + " " + "b" = "a b" start off with a var for message then another var for name write a code for popup or alert that combines these two variables var message = "I'm happy to see you"; var name = "Josh"; alert(message + ", " + name + "."); String Lengths and Retreiving the Number of Characters in a String length property word.length --- will give us number of characters var name = "Angela"; name.length; name.length will return 6 write code to create a prompt to enter a long string report back to the user how many they've written tell them how many they have left var novel = prompt("Type your message here. Remember it must be within 280 characters: "); var lengthDiff = 280 - novel.length; alert("You have written " + novel.length + " characters. You have " + lengthDiff + " remaining.") variation: use parenthesis inside the alert for the arithmetic instead of creating a new var like I did comments: - two forward slashes, //, for a single line comment - forward slash and star, /* Slicing and Extracting Parts of a String take off the extra characters so you don't show a negative number for character remaining when you go over (like on twitter) slice(x,y) function turn your code into comments: ctrl + / (while highlighted) var name = "Angela"; name.slice(0,1); the numbers are start, finish - each number is an index for the location of the character within the string. numbers start with 0 in almost anything in computer science excludes the second index abc to slice and extract the first character, slice(0,1) to get the first 3 characters: slice(0,2) to get just the last 2 characters: slice(1,3) write an alert to cut down your tweet to 140 characters var novel = prompt("Type your message here. Remember it must be within 140 characters: "); alert("Here is your tweet: " + novel.slice(0,140)) Challenge: Changing Casing in Text toUpperCase() -- change everything in a string to capital letters word.toUpperCase() var name = "Josh"; name.toUpperCase(); or change our variable to all upper case: name = name.toUpperCase(); also change to lower case: toLowerCase() var name = prompt("What is your name?"); alert("Hello " + name): create a prompt asking user for their name. if they give upper case or lower case, change it so that only the first character is capitalized and the rest lower case. var name = prompt("What's your name?"); var first = name.slice(0,1); var rest = name.slice(1,name.length); var capital = first.toUpperCase(); var small = rest.toLowerCase(); alert("Nice to meet you " + capital + small + "."); 1. store a var that user enters via prompt 2. Capitalize the first letter of their name 1. isolate the first character 2. turn the first character to upper case 3. isolate the rest of the name 4. concatenate the first char with the rest of the chars 3. Use the capitalized version of their name to greet them using an alert Angela used the console to check each line of the code as she thought through it and verified that she had the right index numbers in slice(). looks like I went further and used toLowerCase in the case that the user gives all capitlized letters essential skill: take a big problem break it down into small pieces and work on each one by one Edge Cases: important to address because you'll have thousands of users using your website/app/program Basic Arithmetic and the Modulo Operator in JavaScript Modulo var e = 9 % 6; modulo, % gives the remainder of a division 12%8 = 4 using %2, 0 means an even number, 1 means an odd number var cost = 3 + 5 * 2 precedence: same as in math -- multiplication first, then addition Parentheses: (3+5)*2 -- always executed first When you want to keep multiplication first, good practice is to always put it into parentheses (), even though multiplication is always first anyways. Challenge: Dog Age to Human Age Formula humanAge = (dogAge - 2) x 4 + 21 create a prompt asking the user for the age of their dog convert to human age report back to user through an alert var dogAge = prompt("Please enter the age of your canine: "); var humanAge = (dogAge-2)*4+21; alert("Your canine's age as a human is: " + humanAge + "."); Increment and Decrement Expressions Increase by 1: var x = 5; x = x+1; x++ is the same expression, known as the increment expression Decrease by 1: x=x-1; x-- is the same, called the Decrement expression. increase by more than one: += x += 2 works with variables: var x = 5; var y = 3; x += y; //this equals 8 and sets x equal to 8 as well works with all the other operators: +=, -=, *=, /= Quiz there's a question that doesn't seem correct var x=3; var y=x++; y+=1; correct answer says 4, but I think it would be 5 Functions Part 1: Creating an Calling Functions keyword: function name parentheses curly brackets with code inside: function name() { } keyword 'function' is only used when you create the function calling the function, you just need the name and parentheses: getMilk(); Angela used a cute animation of a robot and instructions (using the alert function) for each step telling the robot going to the store to by some milk. Then she each instruction and put it into her function getMilk(); Syle: when creating a function, indent all the code inside of the curly braces. Angela uses console.log now instead of alerts (which you have to click through in chrome). difference between console.log and alert: console.log shows only in the console -- it's meant for the developer for messages, especially those related to debugging Challenge http://stanford.edu/~cpiech/karel/ide.html Write your own functions 1. Use Karel the robot (click link) 2. change to 5x5 3. notice function main() 4. Karel takes commands -- see the reference 5. Make a function, separate from main 6. Call it in main 7. Challenge: write code to move karel all the way to the upper right corner in the 5x5 /** * Welcome to the Stanford Karel IDE. * This is a free space for you to * write any Karel program you want. **/ function main(){ //your code here traveltoEdge(); turnLeft(); traveltoEdge(); } function traveltoEdge() { move(); move(); move(); move(); } Functions allow us to remove repitition as well as identify errors. Write code to command karel to put down beepers in a patter: a diagonal line from bottom left to upper right corner. Use least repetitive way possible, using functions. function main(){ //your code here putBeeper(); putSecondBeeper(); putRest(); } function putSecondBeeper(){ move(); turnLeft(); move(); putBeeper(); } function putNextAfterTwo(){ turnRight(); move(); turnLeft(); move(); putBeeper(); } function putRest(){ putNextAfterTwo(); putNextAfterTwo(); putNextAfterTwo(); } Optional challenge: Get Karel to create a chess board pattern. function main(){ //your code here twoBeeperRow(); upRightSide(); threeBeeperRow(); upLeftSide(); twoBeeperRow(); upRightSide(); threeBeeperRow(); upLeftSide(); twoBeeperRow(); } function twoBeeperRow(){ move(); putBeeper(); move(); move(); putBeeper(); move(); } function threeBeeperRow(){ putBeeper(); move(); move(); putBeeper(); move(); move(); putBeeper(); } function upRightSide(){ turnLeft(); move(); turnLeft(); } function upLeftSide(){ turnRight(); move(); turnRight(); } Solution is pretty much the same! Next lecture has me copying the following code in advance: function getMilk() { console.log("leaveHouse"); console.log("moveRight"); console.log("moveRight"); console.log("moveUp"); console.log("moveUp"); console.log("moveUp"); console.log("moveUp"); console.log("moveRight"); console.log("moveRight"); console.log("moveLeft"); console.log("moveLeft"); console.log("moveDown"); console.log("moveDown"); console.log("moveDown"); console.log("moveDown"); console.log("moveLeft"); console.log("moveLeft"); console.log("enterHouse"); } Functions Part 2: Parameters and Arguments Functions come in 3 classic flavors. what we just learned was like vanilla -- the first and most basic. Parameters - input between the parentheses we're going to specify bottles of milk into getMilk function getMilk(bottles) { var cost = bottle * 1.5; //do something with cost } Functions that take parameters are like chocolate, slightly more functionality and do a lot more. function getMilk(bottles) { console.log("leaveHouse"); console.log("moveRight"); console.log("moveRight"); console.log("moveUp"); console.log("moveUp"); console.log("moveUp"); console.log("moveUp"); console.log("moveRight"); console.log("moveRight"); console.log("buy " + bottles + " bottles of milk"); console.log("moveLeft"); console.log("moveLeft"); console.log("moveDown"); console.log("moveDown"); console.log("moveDown"); console.log("moveDown"); console.log("moveLeft"); console.log("moveLeft"); console.log("enterHouse"); } getMilk(12); Challenge: Change the code to take money instead of bottles. Calculate how many bottles the robot is able to buy. give your robot $10 and milk cost $1.50, how many bottle of milk can he buy? function getMilk(budget) { console.log("Buy " + (budget/1.5) + "bottles."); } Angela created a var for the division And she also addresses non-intergers How do we round in JavaScript? Math.floor(number goes here); var numberOfBottles = Math.floor(budget/1.5); Outputs and Return Values Functions that are able to give output return -- keyword for a function to output a value in her getMilk() function, she put a line at the end: return budget % 1.5; which is the change for what we bought, so we'd we could even specify that in a variable: var change = getMilk(4); We can assign a function that returns a value. Here, we're using the function to define a variable. she creates a function to use in the main function to calculate how many bottles of milk. then she creates a function to return the change she then places both in the function function getMilk(money, costPerBottle) { console.log("leaveHouse"); console.log("moveRight"); console.log("moveRight"); console.log("moveUp"); console.log("moveUp"); console.log("moveUp"); console.log("moveUp"); console.log("moveRight"); console.log("moveRight"); console.log("buy " + calcBottles(money, costPerBottle)+ " bottles of milk"); console.log("moveLeft"); console.log("moveLeft"); console.log("moveDown"); console.log("moveDown"); console.log("moveDown"); console.log("moveDown"); console.log("moveLeft"); console.log("moveLeft"); console.log("enterHouse"); return calcChange(money, costPerBottle); } function calcBottles(startingMoney, costPerBottle) { var numberOfBottles = Math.floor(startingMoney / costPerBottle); return numberOfBottles; } function calcChange(startingAmount, costPerBottle) { var change = startingAmount % costPerBottle; return change; } console.log("Hello master, here is your " + getMilk(5, 1.5) + " change."); Challenge: Create a BMI Calculator Angela's included the formula for BMI: create a function hat take weight and height as inputs and give the output that's equal tot he BMI copy index.js contents and use the chrome developer tools function bmiCalculator(weight, height) { return Math.round(weight/(height*height)); } var bmi = bmiCalculator(65,1.8); alert("Your BMI is approximately " + bmi + " kilograms per square meter.") I had at first used toPrecision, but the assignment didn't like that solution. It told me I had to round. So I checked the MDN docs and used Math.round with the calculation inside the parentheses. Angela's solution: function(weight, height) { var bmi = weight / (height * height); return bmi; } raise to the power of 2 in javascript: googling the docmentation: Math.pow(base, exponent) Math.pow(height, 2) function(weight, height) { var bmi = weight /Math.pow(height, 2); return Math.round(bmi); } Tip from Angela - Set Your Expectations Coding isn't easy. It's not realistic to think that you aren't smart because you don't udnerstand soemthing because it is in fact hard. Conversely, it can be easy to think that it's impossible. But the only difference between a master and a beginner is the amount of work that that person has been able to put in. 10,000 hours! I have to go to a networking meetup and try to get some information from some engineers about learning and careers. I'll continue later on into the night. _____________________________________ Later tonight lol it's now 10:13 and starting again Next Section: Intermediate Javascript First Section Random Number Generation in JavaScript: Building a Love Calculator Random number Generation var n = Math.random(); any number between 0 and 0.9999999999999999 16 decimal places never reaches 1, but can be 0.0000000000000000 see MDN documentation for Math.random() where it says: "The Math.random() function returns a floating-point, pseudo-random number in the range 0 to less than 1 (inclusive of 0, but not 1) with approximately uniform distribution over that range — which you can then scale to your desired range. The implementation selects the initial seed to the random number generation algorithm; it cannot be chosen or reset by the user." this let's us generate over a billion numbers var n = Math.random() n=n*6; //multiple the number by the cap you want -- this one will never reach 6 n = Math.floor(n) + 1; //round down to nearest integer so that it returns any integer between 0 to 5 console.log(n); //print out to console Extra resource for randomness: https://www.youtube.com/watch?v=GtOt7EBNEwQ Math.random() isn't useful until we scale it. multiply by the desired cap, then use Math.floor to round down to nearest whole integer. Add one to get random 1 though 6 Challenge: 1. create a love calc 2. two prompts for names of two people 3. generate a number between 1 and 100 4. give info back to user as an alert giving their love score var name1 = prompt("Please enter the name of a person."); var name2 = prompt("Please enter the name of the love interest of that person."); var loveScore = Math.random(); loveScore*=100 loveScore = Math.floor(loveScore)+1; alert("The love score of " + name1 + " and " + name2 + " is " + loveScore + "%."); Control Statements: Using If/Else Conditionals and Logic need to evaluate if statement is true control flow: if/else logic statements if (track === "clear") {goStraight();} else {turnRight();} 3 equal signs back to back check for equality in JavaScript conditional statements beautification is important for readability: if(track === "clear") { goStraight(); } else { turnRight(); } for out love calculator: if(loveScore === 100) { alert("Your love score is " + loveScore + "%. " + "You love each other like Kanye loves Kanye."); } else { alert("Your love score is " + loveScore + "%. "); } Comparitors and Equality Is equal to === is not equal to !== <, >, <=, >= two instead of three equal signs? what's the difference? var a = 1; var b = "1"; if (a===b) { console.log("yes"); } else { console.log("no"); } this will show "no" because a is a number and b is a string. however, if you use == it will show yes three equal signs checks datatype as well as value. == only checks for value what if we could separate the love score ranges further, more than just one or two ranges. use AND and OR Combining Comparators above 30, but below 70 combine comparators: && and || or if(loveScore > 30 && loveScore <= 70) { alert(""); } if (loveScore <= 30) { alert(); } Assignment: BMI Calculator Advanced (IF/ELSE) function bmiCalculator (weight, height) { var bmi = weight / Math.pow(height, 2); var interpretation = ""; if(bmi<18.5){ interpretation = "Your BMI is " + bmi + ", " + "so you are underweight."; } else if (bmi>=18.5 && bmi<24.9) { interpretation = "Your BMI is " + bmi + ", " + "so you have a normal weight."; } else if (bmi>=24.9) { interpretation = "Your BMI is " + bmi + ", " + "so you are overweight."; } return interpretation; } yay, it's correct Collections: Working with JavaScript Arrays store multiple items into an array in Angela's example, names of invitees to check to see if they were invited to her party to make sure too many uninvited people come var myEgg = eggs[1]; var eggs = [🥚,🥚,🥚,🥚,🥚,🥚,🥚,🥚] must use square brackets position is called index and starts from 0 eggs[1] eggs.length = 8 var guestList = []; whenever you see square brackets, it usually is related to a collection data type -- most often arrays var guestList = ["Angela", "Jack", "Tim"]; console.log(guestList[0]); use function includes() to see if the array contains that specified item -- eggs.includes() write code to create a prompt that asks for guest's name check the array for that name if it exists tell them welcome if it doesn't, tell them they aren't on the guest list var guestList = ["Angela", "Jack", "Tim", "James", "Jason"]; var stranger = prompt("Please enter your name: "); if(guestList.includes(stranger)) { alert("Welcome to the party, " + stranger + "!"); } else { alert("I'm sorry, you aren't on the guest list."); } Angela called her variable guestName. stranger is more fun, in my opinion Angela ended the lecture with a bad joke: Why did the programmer quit his job? Because he didn't get arrays. Adding Elements and Intermediate Array techniques computer science degrees apparently don't prepare people to actually code. 1 out of 200 applicants can't write good code. from coding horror website fizz buzz fizzbuzz game kids saying number 1 after another if divisible by 3, fizz, by 5, buzz, both fizzbuzz get code to print out sequence of numbers starting by 1 var output = []; output.push(1); push adds the specified contents to the array. always adds to the end of the array. pop take off the last item of the specified array. output.pop; make a function to automate adding numbers to the array var output = []; function fizzBuzz() { console.log(output); } Challenge: add to the function such that when you call it, a new item will be added to the array, increments by one. function fizzBuzz() { var n = 0; output.push(n+1); console.log(output); } --------------------------- var output = []; var n = 0; function fizzBuzz() { n = n+1; output.push(n); console.log(output); } Angela's: var output = []; var count = 1; function fizzBuzz() { output.push(count); count++; } Instead of putting 3, enter "fizz" into the array, buzz for 5, fizzbuzz for both Use the modulo -- if remainder is 0, that means the number is divisible by the number you chose to divide by -- in this case, 3 and 5 var output = []; var count = 1; function fizzBuzz() { if(count%3===0 && count%5===0) { output.push("fizzbuzz"); } else if(count%3===0) { output.push("fizz") } else if(count%5===0) { output.push("buzz"); } else { output.push(count); } console.log(output); count++; } yay I got it. I just realized, you have to execute the script before you can use the function in the console. Ah, I was right to put the check for both at the top of the if chain (sorry, I should say 'control flow'). the order of your if statements matters. link to a funny story of an engineer who automated his entire work life with code https://www.jitbit.com/alexblog/249-now-thats-what-i-call-a-hacker/ Control Statements: While loops simplest type of loops are while loops while (condition) { do something } --------------------------------------- var i=1; while (i<2) { console.log(i); i++; } automate fizzBuzz so we don't have to manually call it in console var output = []; var count = 1; function fizzBuzz() { while(count <= 100) { if(count%3===0 && count%5===0) { output.push("fizzbuzz"); } else if(count%3===0) { output.push("fizz") } else if(count%5===0) { output.push("buzz"); } else { output.push(count); } count++; }//while console.log(output); }//function problem with while loops is that they will run infinitely until the statement becomes false. If you forget to increment the count variable, it will just run forever and crash your system (chrome in this case). apple called their loop at their HQ 'infinite loop' Bad joke: A programmer's wife told him "while you're at the store, get some milk." And he never came back Baby woke up, so I turned the computer off so the glare wouldn't distract her from nursing. |
|
|
|
|


|
joshmrallen
February 11, 2020, 3:28 AM
|
|
|
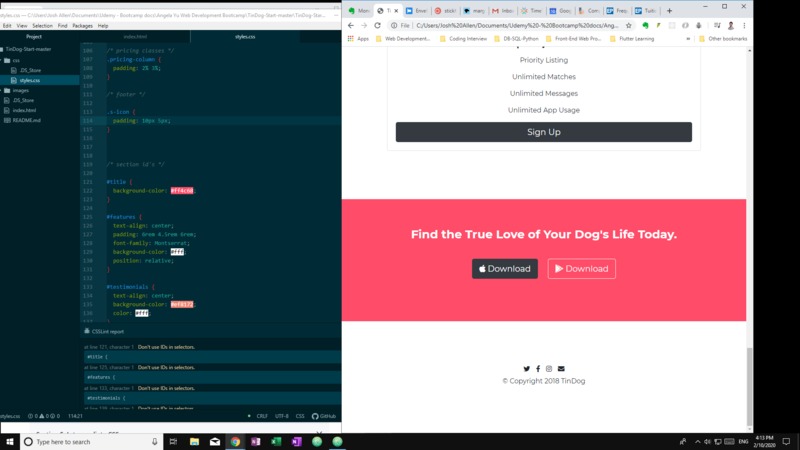
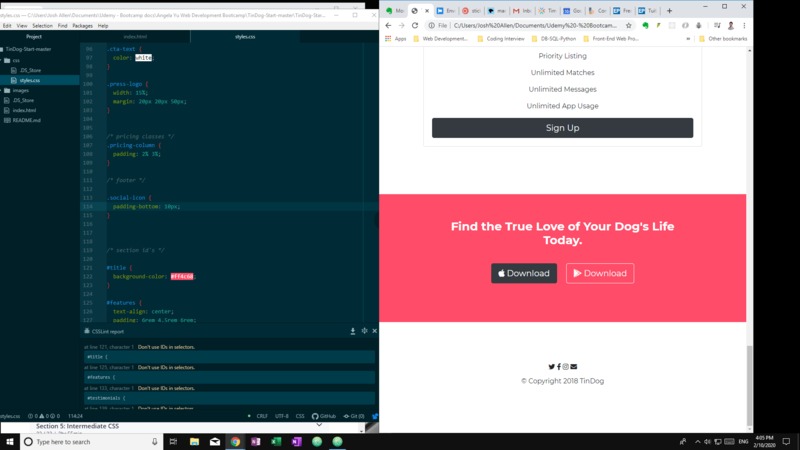
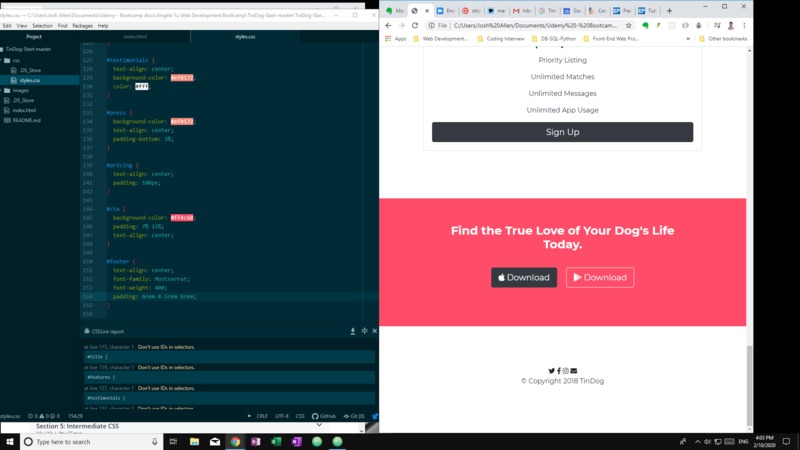
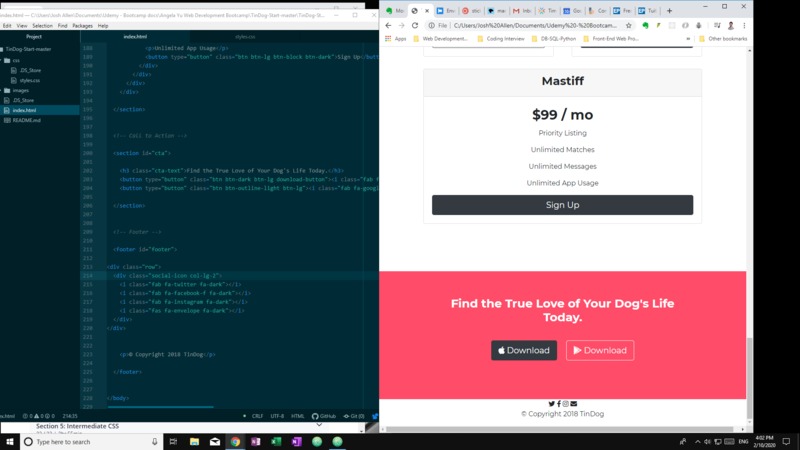
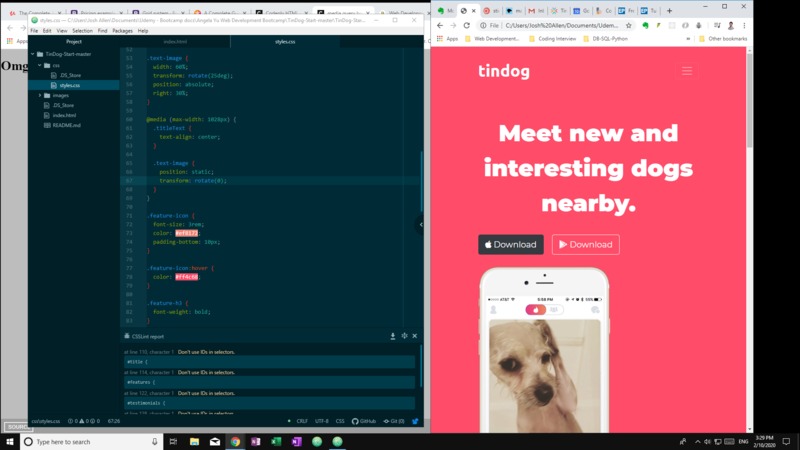
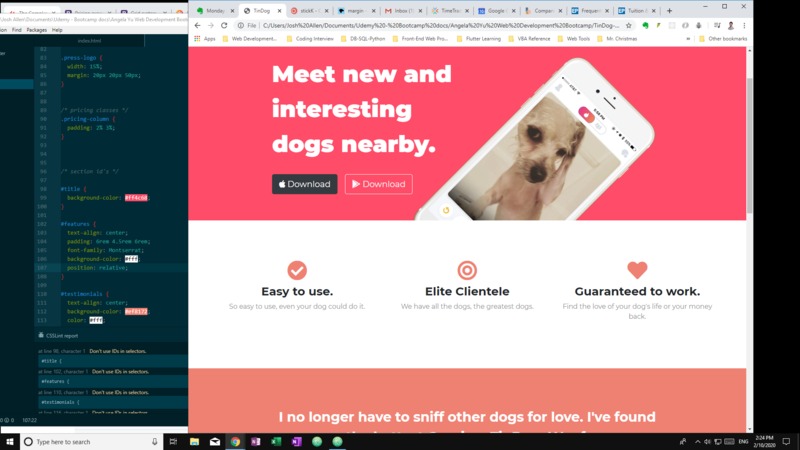
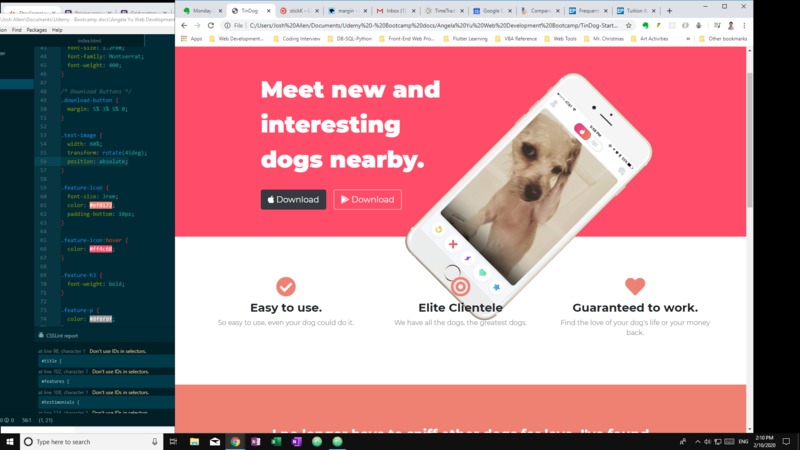
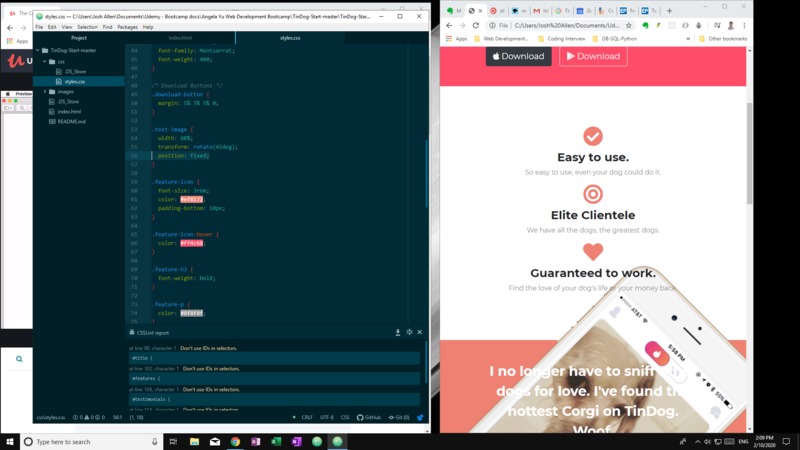
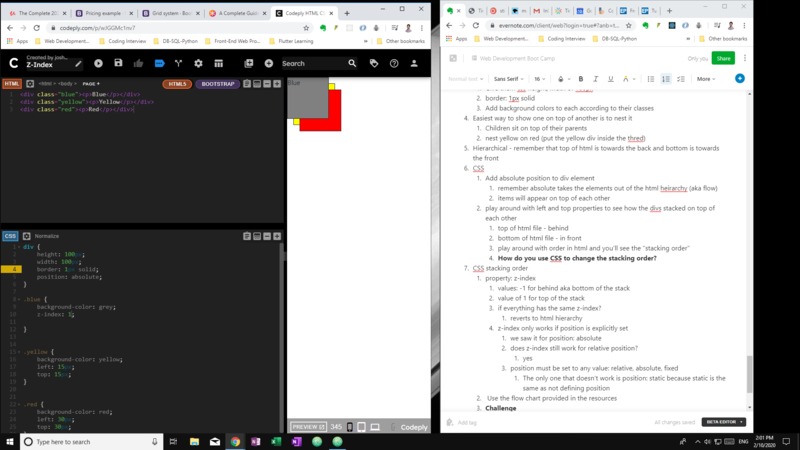
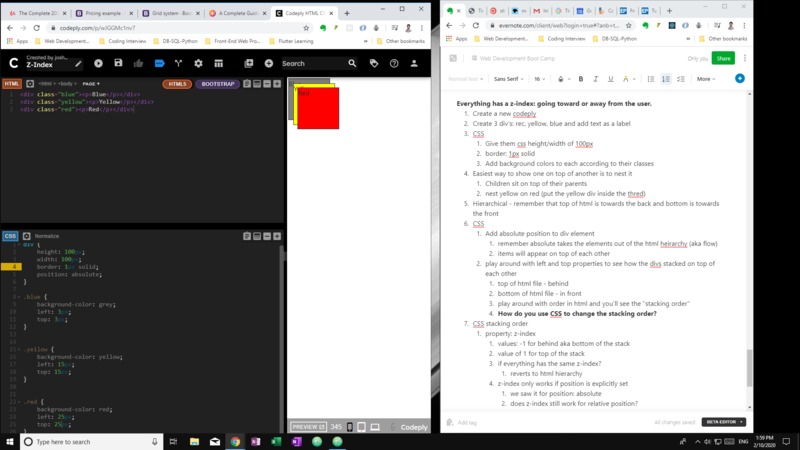
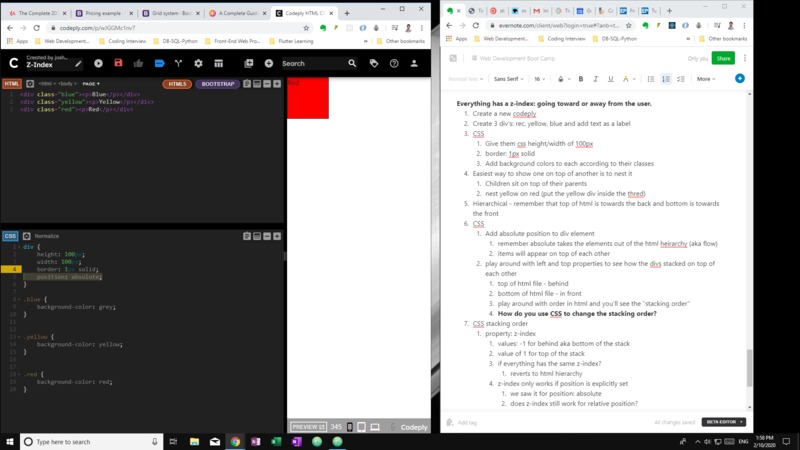
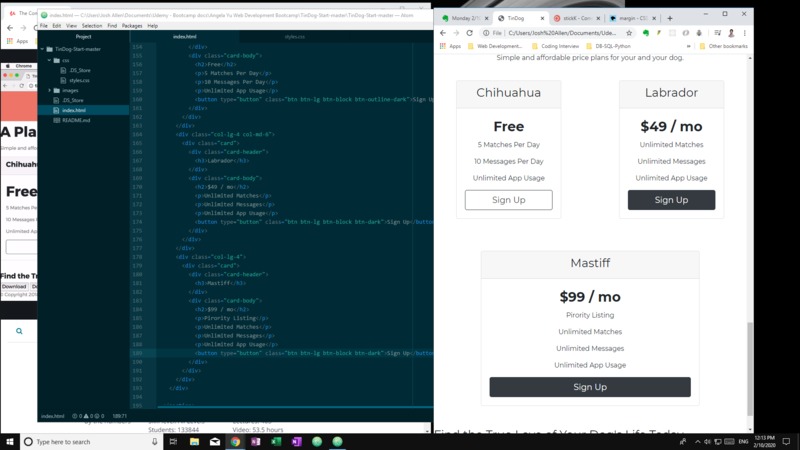
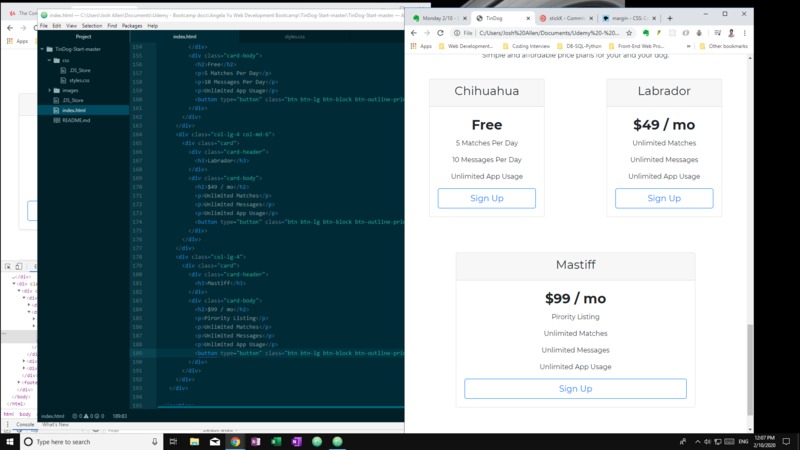
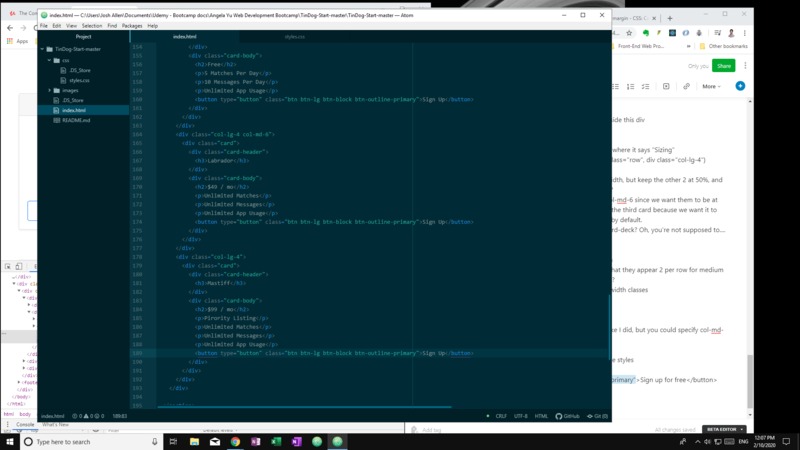
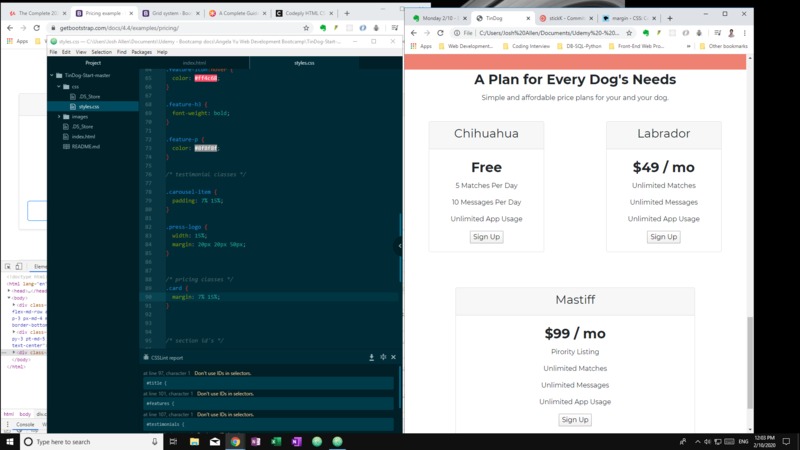
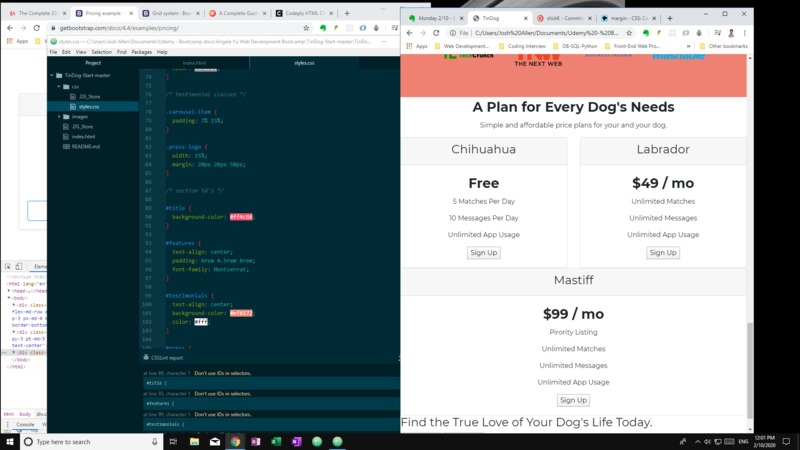
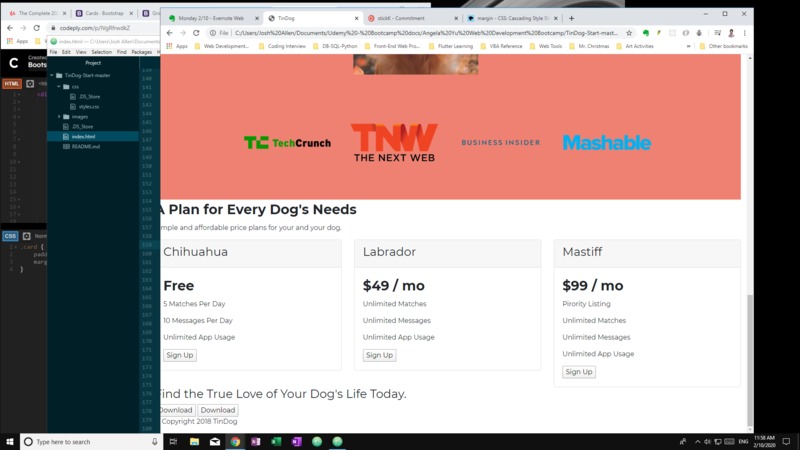
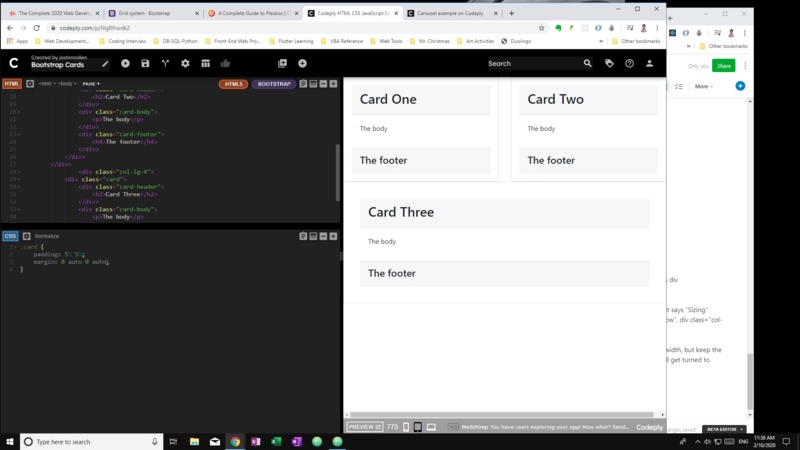
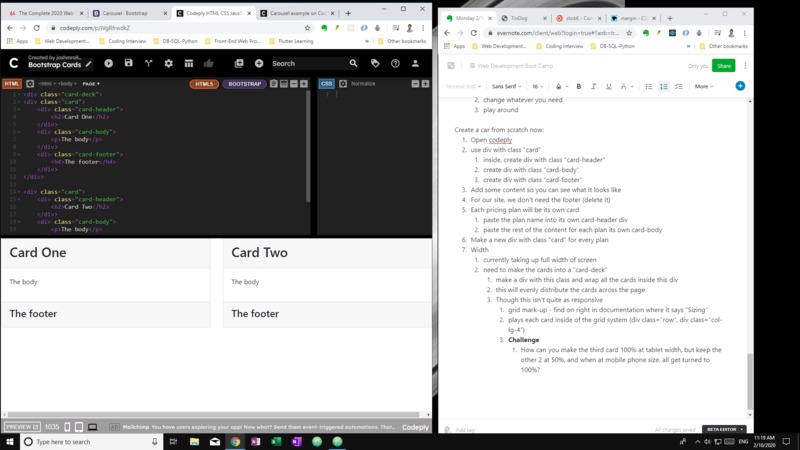
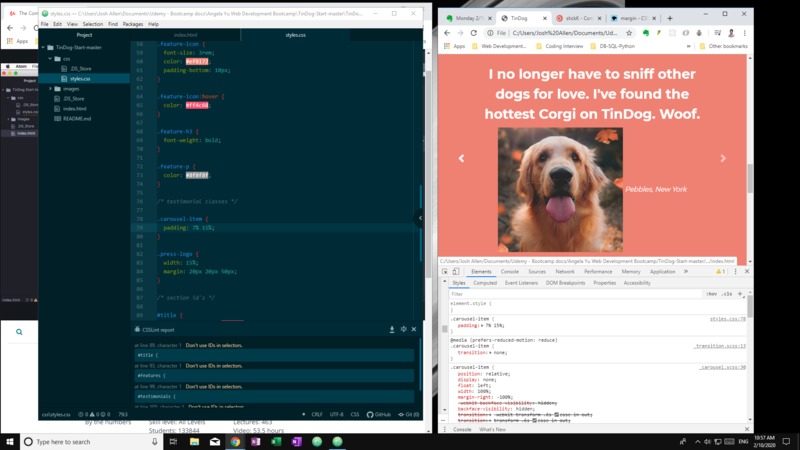
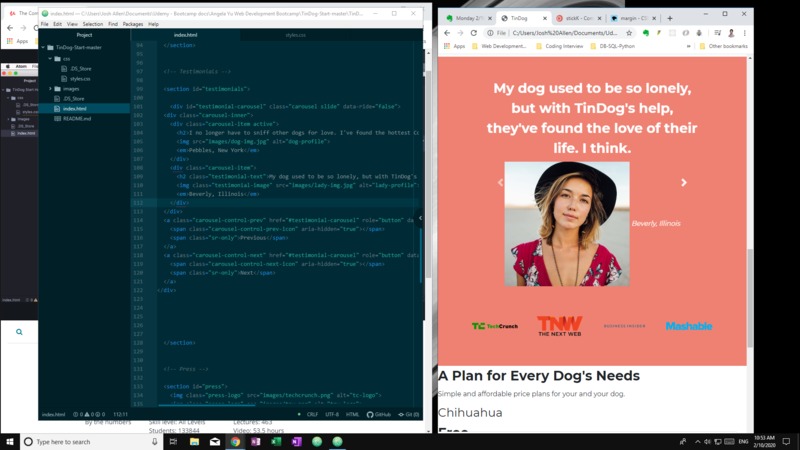
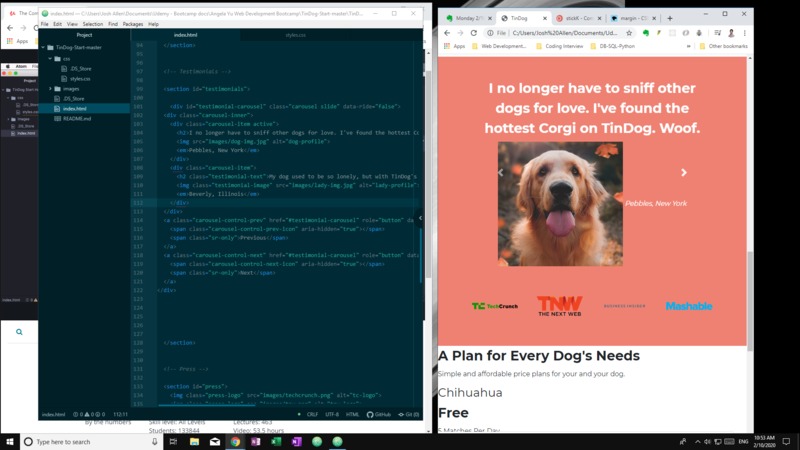
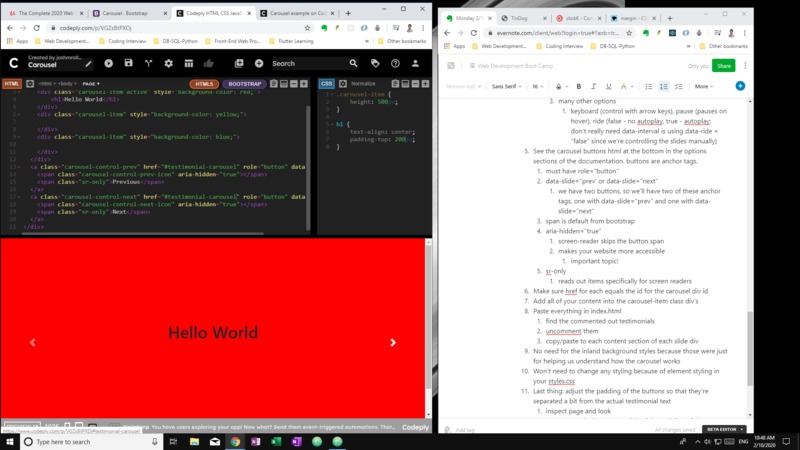
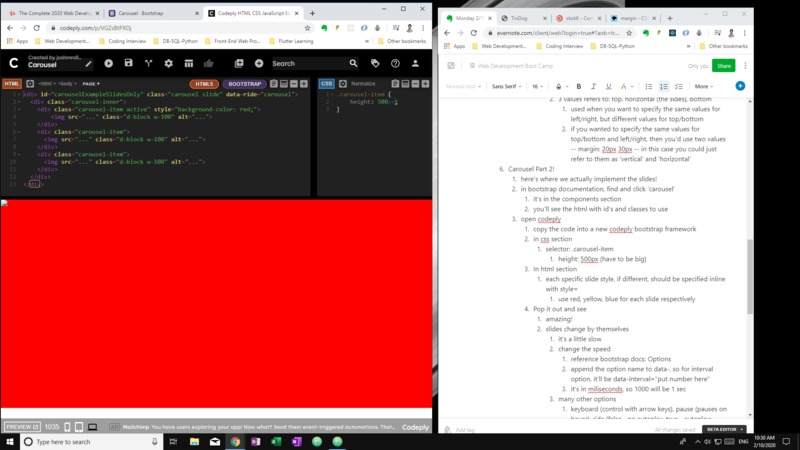
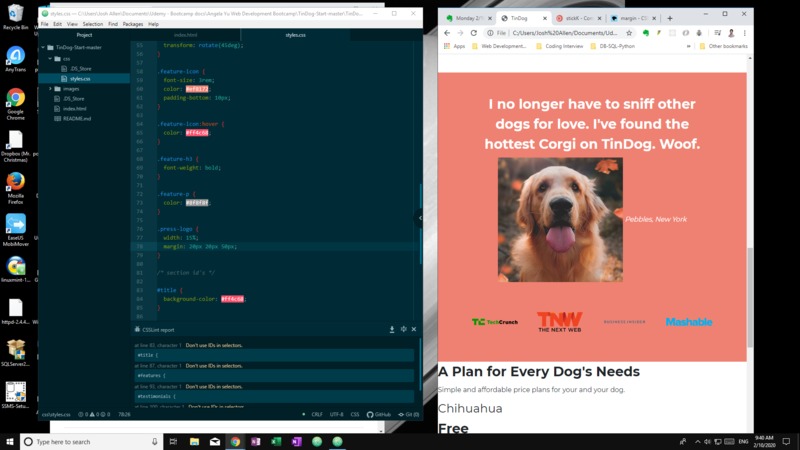
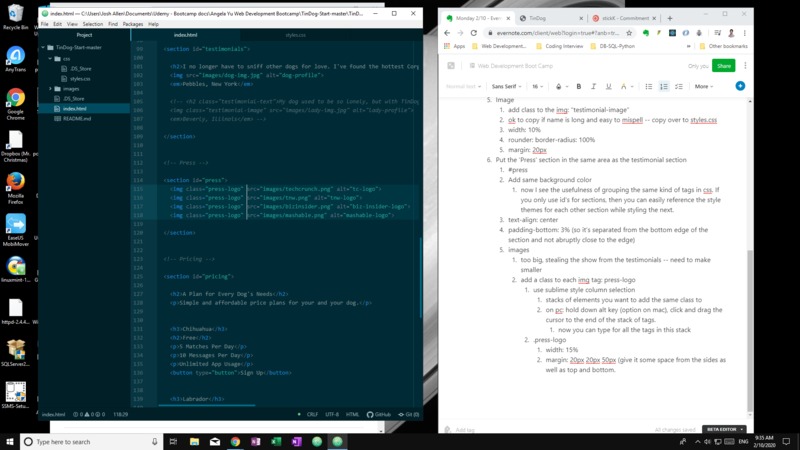
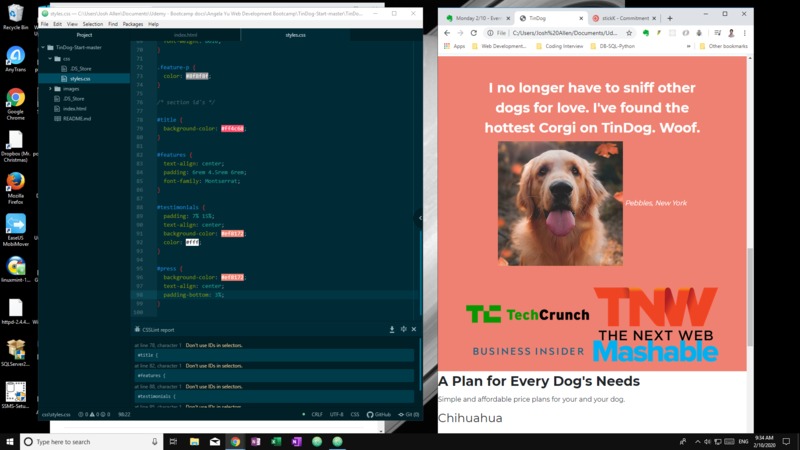
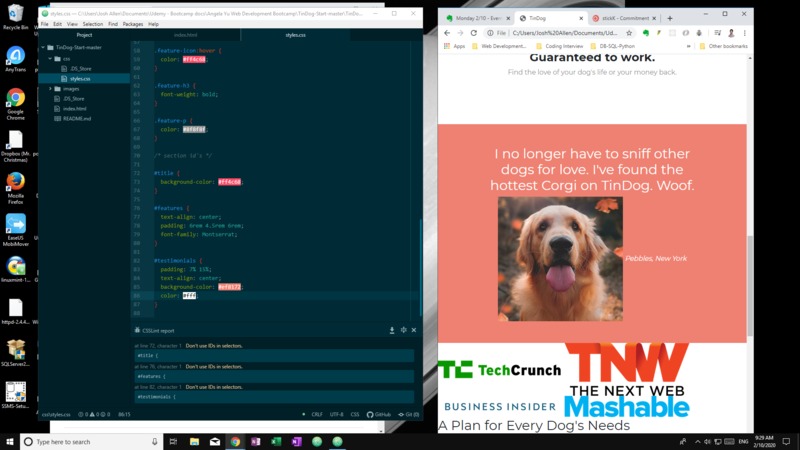
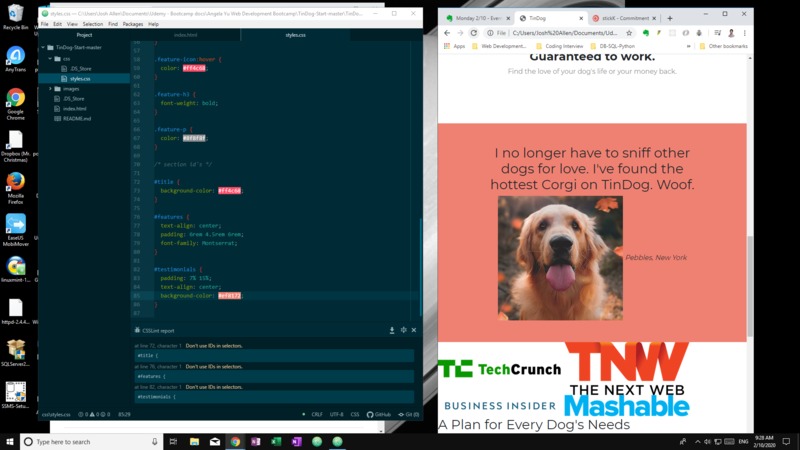
Beginning the Intermediate Bootstrap section: Section 7 First lecture: The Bootstrap Carousel Part 1 The carousel is a "slideshow" Style the testimonial section before we add the carousel: 1. Take a look at the next section in index.html 2. Add the id to styles.css 1. #testimonials 1. padding: 7% 15% 1. top/bottom, left/right 2. text-align: center 3. style the background to a color in the color scheme 1. good to have alternating color sections in one-page sites 2. #ef8172 4. text 1. color: #fff (ok to keep in #testimonmials. color property will apply to just text) 2. h2 for all: (put up top with other element styling) 1. font-family: Montserrat 2. font-weight: bold 3. line-height: 1.5; 1. just a number, not rem 5. Image 1. add class to the img: "testimonial-image" 2. ok to copy if name is long and easy to mispell -- copy over to styles.css 3. width: 10% 4. rounder: border-radius: 100% 5. margin: 20px 6. Put the 'Press' section in the same area as the testimonial section 1. #press 2. Add same background color 1. now I see the usefulness of grouping the same kind of tags in css. If you only use id's for sections, then you can easily reference the style themes for each other section while styling the next. 3. text-align: center 4. padding-bottom: 3% (so it's separated from the bottom edge of the section and not abruptly close to the edge) 5. images 1. too big, stealing the show from the testimonials -- need to make smaller 2. add a class to each img tag: press-logo 1. use sublime style column selection 1. stacks of elements you want to add the same class to 2. on pc: hold down alt key (option on mac), click and drag the cursor to the end of the stack of tags. 1. now you can type for all the tags in this stack 2. .press-logo 1. width: 15% 2. margin: 20px 20px 50px (give it some space from the sides as well as top and bottom. 1. I keep forgetting what the number of values refers to 2. 3 values refers to: top, horizontal (the sides), bottom 1. used when you want to specify the same values for left/right, but different values for top/bottom 2. if you wanted to specify the same values for top/bottom and left/right, then you'd use two values -- margin: 20px 30px -- in this case you could just refer to them as 'vertical' and 'horizontal' 6. Carousel Part 2! 1. here's where we actually implement the slides! 2. in bootstrap documentation, find and click 'carousel' 1. it's in the components section 2. you'll see the html with id's and classes to use 3. open codeply 1. copy the code into a new codeply bootstrap framework 2. in css section 1. selector: .carousel-item 1. height: 500px (have to be big) 3. In html section 1. each specific slide style, if different, should be specified inline with style= 1. use red, yellow, blue for each slide respectively 4. Pop it out and see 1. amazing! 2. slides change by themselves 1. it's a little slow 2. change the speed 1. reference bootstrap docs: Options 2. append the option name to data-, so for interval option, it'll be data-interval="put number here" 3. it's in miliseconds, so 1000 will be 1 sec 4. add data-interval to just the carousel-item active or to each carousel-item? you can and should add it to the id div 3. many other options 1. keyboard (control with arrow keys), pause (pauses on hover), ride (false - no autoplay, true - autoplay; don't really need data-interval is using data-ride = "false" since we're controlling the slides manually) 5. See the carousel buttons html at the bottom in the options sections of the documentation. buttons are anchor tags. 1. must have role="button" 2. data-slide="prev' or data-slide="next" 1. we have two buttons, so we'll have two of these anchor tags, one with data-slide="prev" and one with data-slide="next" 3. span is default from bootstrap 4. aria-hidden="true" 1. screen-reader skips the button span 2. makes your website more accessible 1. important topic! 5. sr-only 1. reads out items specifically for screen readers 6. Make sure href for each equals the id for the carousel div id 7. Add all of your content into the carousel-item class div's 8. Paste everything in index.html 1. find the commented out testimonials 2. uncomment them 3. copy/paste to each content section of each slide div 9. No need for the inland background styles because those were just for helping us understand how the carousel works 10. Won't need to change any styling because of element styling in your styles.css 11. Last thing: adjust the padding of the buttons so that they're separated a bit from the actual testimonial text 1. inspect page and look 2. want to put the buttons outside of the padding of the carousel divs 3. specify padding only for carousel-item 1. move from #testimonials to .carousel-item 4. buttons are able to be clicked anywhere on right or left thanks to better, more specific padding Beautiful! Next lecture: Cards Look at examples in bootstrap documentation: pricing example Also a site called "bootsnip.com" that has examples for different website components (licensed components) 1. inspect page 2. look around <body> 3. choose div that contains nothing but the pricing table 4. copy it "copy element" 5. Open codeply 1. paste 2. change whatever you need 3. play around Create a card from scratch now: 1. Open codeply 2. use div with class "card" 1. inside, create div with class "card-header" 2. create div with class "card-body" 3. create div with class "card-footer" 3. Add some content so you can see what it looks like 4. For our site, we don't need the footer (delete it) 5. Each pricing plan will be its own card 1. paste the plan name into its own card-header div 2. paste the rest of the content for each plan its own card-body 6. Make a new div with class "card" for every plan 7. Width 1. currently taking up full width of screen 2. need to make the cards into a "card-deck" 1. make a div with this class and wrap all the cards inside this div 2. this will evenly distribute the cards across the page 3. Though this isn't quite as responsive 1. grid mark-up - find on right in documentation where it says "Sizing" 2. plays each card inside of the grid system (div class="row", div class="col-lg-4") 3. Challenge 1. How can you make the third card 100% at tablet width, but keep the other 2 at 50%, and when at mobile phone size, all get turned to 100%? 2. You make col-lg-4 for all three; first two also get col-md-6 since we want them to be at half the screen each. we don't specify anything for the third card because we want it to take up 100% of the screen in md and it does that by default. 4. But I'm not sure how to incorporate grid while using card-deck? Oh, you're not supposed to.... 1. yes, Angela replaced card-deck with "row" 2. Also, they have specific classes for cards in grids: 1. .row-cols-1 for laying out cards on one column 2. .row-cols-md-2 splitting up multiple cards so that they appear 2 per row for medium viewpoints. guess we can use lg in place of md? 3. Up to now, we've practiced only with variable width classes 5. Solution 1. she uses col-lg-4 for all three 2. she uses col-md-6 for the first 2 3. she doesn't specify anything for the 3rd, like I did, but you could specify col-md-12 and get the same result 8. Challenge 2 1. Make the buttons match the bootstrap example styles: 1st one is outline, other two are solid 2. inspected the example of pricing 3. copied the button class it used 4. pasted it in the buttons for my first button: 1. class="btn btn-lg btn-block btn-outline-primary" 5. solid buttons 1. class="btn btn-lg btn-block btn-primary" 9. Solution 1. Oh, Angela wants to make them dark instead of primary 1. btn btn-lg btn-block btn-outline-dark 2. btn btn-lg btn-block btn-dark 10. Styling the cards 1. #pricing 1. padding: 100px 1. it's rare to have static padding on all 4 sides, but pricing in Angela's opinion looks better on mobile 2. text-align: center 2. give each card its space 1. give unique class for columns: "pricing-column 1. padding: 2% 3% 2. woops, I had margin and didn't change it and it messed up the responsiveness. Now it's padding and it looks great....oh wait, the 3rd card is longer? Oh, because it has one more line of text than the others. 3. I think it's fine. Next lecture: The CSS Z-index and Stacking Order Angela wants the image to show up behind the features section -- making the website looking more compact and organized. Everything has a z-index: going toward or away from the user. 1. Create a new codeply 2. Create 3 div's: rec, yellow, blue and add text as a label 3. CSS 1. Give them css height/width of 100px 2. border: 1px solid 3. Add background colors to each according to their classes 4. Easiest way to show one on top of another is to nest it 1. Children sit on top of their parents 2. nest yellow on red (put the yellow div inside the thred) 5. Hierarchical - remember that top of html is towards the back and bottom is towards the front 6. CSS 1. Add absolute position to div element 1. remember absolute takes the elements out of the html heirarchy (aka flow) 2. items will appear on top of each other 2. play around with left and top properties to see how the divs stacked on top of each other 1. top of html file - behind 2. bottom of html file - in front 3. play around with order in html and you'll see the "stacking order" 4. How do you use CSS to change the stacking order? 7. CSS stacking order 1. property: z-index 1. values: -1 for behind aka bottom of the stack 2. value of 1 for top of the stack 3. if everything has the same z-index? 1. reverts to html hierarchy 4. z-index only works if position is explicitly set 1. we saw it for position: absolute 2. does z-index still work for relative position? 1. yes 3. position must be set to any value: relative, absolute, fixed 1. The only one that doesn't work is position: static because static is the same as not defining position 2. Use the flow chart provided in the resources 3. Challenge 1. use the flow chart to make our phone image hide behind the features setting 2. remember that our features section is actually transparent 1. you need to explicitly set it to white in order to hide the image completely 3. My solution 1. flowchart pdf isn't in the resources. Looking at timestamp 11:31 in lecture 87 2. I played around with the position of the .text-image 1. fixed stays in the same place regardless of where you scroll on the page 2. relative is pretty much like it was - the phone moves relative to the other items 3. absolute is what we want -- it puts it where the image is and doesn't move relative to the other section, etc. 4. Now I'll add a z-index of -1 1. that didn't work: it put the phone underneath its own section. 2. z-index of 0 works. 3. Now I change up the features section a bit: 1. background-color: #fff (white) 2. position: relative (absolute puts the section and doesn't allow the layout to organize it with respect to its contents) 3. z-index: -1 4. It worked! 4. Angela's solution: 1. changed the background to white, aka #fff 2. all items have z-index of 0 by default 3. she set title-image to absolute 4. she set absolute for features and z-index to 1 5. phone is hidden 6. she changed features to relative! yay 7. flowchart 1. are they both positioned elements? 2. both z-index? no 3. does one have a z-index? yes 4. z-index > 0? yes (features section) 8. so you didn't have to specify z-index for the image 1. don't even need z-index for features 2. features is below image in the flow 1. will be on top 9. One last thing to adjust: 1. cutting too much of the phone and not enough space for download buttons 2. container-fluid contains these 1. make padding on bottom larger 2. padding: 3% 15% 7% 1. bottom gets 7% padding 3. push the top menu to the right a bit 4. .title-image -- right: 30% 1. margin to right is lower, distributing the menu a bit better Next lecture: Media Query Breakpoints Finally get to know what breakpoints are. Image disappears when you shrink to mobile size. How can we modify our website's looks for mobile? Why is mobile important? accessibility; google punishes sits that aren't mobile-friendly. use mobile-friendly test (google's site) example for site that is not mobile friendly -- test will say exactly what's wrong solutions by websites: they make a separate mobile site example: facebook -- m.facebook.com m means mobile that's a lot of work best solution make your websites responsive so they look great on desktop as well as mobile/tablet we'll use media query breakpoints to achieve this responsiveness 1. Open codeply 2. remove the bootstrap framework 1. media queries are a pure CSS feature 2. the bootstrap might affect the media queries 3. create a new h1 and say whatever 4. in CSS 1. change color to red 2. if we only wanted items to be read if the page was being printed, we type @media print 1. enclose desired items inside @media print { h1 { color: red; } } The text will only show red if you print the page Other media queries screen speech - activates when read by screen reader many more structure: @media <type> <feature> type: type of media/medium feature: something you check if true or false example: @media screen (min-width: 900px) { //change something } Oh, so media queries are a kind of conditional statement for CSS. so what's a breakpoint? back to codeply: 1. change to: 1. @media (max-width: 900px) { h1 { color: red;} } 2. this would cause the text color to change when screen size becomes smaller than 900px mobile-friendly usage: @mobile (max-width: 900px) { h1 { font-size: 60px; } } This would cause any screen size under 900 px to show the 60px font size. 900px is called the breakpoint. Can specify ranges: @media (min-width: 900px) and (max-width: 1000px) { h1 { font-size: 60px; } } Very responsive! Different words: the size of something device: fixed amount, can't change browser size - not fixed viewport: size of the screen that your website is being viewed -- able to be changed by browser Make our site mobile-friendly: 1. change image so you can still see it on mobile 1. change to static 2. change so it's not rotated on mobile 2. fix title so it's not left-aligned when getting smaller 3. inspect page of our website 1. notice in the upper right-hand corner, chrome will show us the current dimensions of the viewport as it changes. using this, we can get the max-width to use 2. Angela chooses 1028px -- when we go past that breakpoint, the image will go back to static and won't be cut off or obscured @media (max-width: 1028px) { .title-text { text-align: center; } .title-image { positiion: static; transform: rotate(0); <---this is absolute rotation, basically it's location in its rotation } } 4. Make everything center aligned (text) -- hmm, the download buttons and image seem a bit over to the left when viewing the mobile size. anyways. 5. Nice! 6. When building a site: Angela recommends first doing html/css and then making that project responsive and mobile-friendly. 1. Other way is 7. Challenge: 1. Complete the website by completing the call to action section and the footer 1. Call to action section 1. Make the background color, perhaps same as the top: #ff4c68 2. Make font Montserrat bold and white 1. Ah, now I know why styling h3 was better than focusing specifically on the feature-h3 -- the footer haha 3. center it 4. Copy the download buttons from the top 5. Add space between the pricing section and the footer 2. Footer 1. Keep background white/blank 2. center 3. copy styling of menu items at top, keep <p> 4. Add twtter, facebook, instagram, and envelope icons above the copyright (font awesome, dark) 3. Oh, didn't realize there was an actual specification this time 1. it's ok though -- allI had to do was make a row and use col-lg-2, wrapping all the font awesome tags. 2. Made sure to use fa-dark for each to make them dark against the white background. 3. Then I added some padding around the footer section. 4. Then I added some padding-bottom to the .social-icon row (same as the feature icons above, just to give it some space from the text below it. 5. And we're good! 1. oh, just realized that she added spacing between each icon too. col-lg-3? 2. oh and it doesn't center at large screen size. 3. Ok, so I didn't need a div or row or col at all. I just put all the fa stuff, right after one another, like the buttons do. The section is already styled to be center alignment, so they went straight to the center no matter which screen size. 4. Then I added a custom class name because the envelope is fas and we have other font awesome icons here, so I called them all s-icon (s being for social). Then I added padding: 20px 5px and voila. 1. Solution Ok, let's see what Angela says 1. aw man, she used padding: 7% 15% 2. font-size of 3.5rem 3. she gives margin: 20px 10px instead of padding for the s-icon class 4. href's can reference id's in html doc 1. add to navbar items 1. #footer for contact 2. #pricing for pricing 3. #cta for download Next lecture: Refactor code - How to become a Better programmer w/ Code Refactoring WET code: We Enjoy Typing Keep code easy to read - readability Refactor your code and maintain it as if you expect the next person to look at your code to be an ax-murderer. Code Refactoring: (prioritization) 1. Readability 1. think of making it easy for you to come back to the code in a year 2. Modularity 1. how reusable your code is. concise 3. Efficiency 1. languages and other factors 4. Length 1. hear guys brag about how short they make code 2. not necessarily the most important, readability the most important 3. Code Golf 1. coders write the shortest code possible to achieve the objective 2. codegolf.stackexchange.com Next Lecture: Put it into Practice - Refactor our Website Part 1 1. keep all html selectors together (regular bold, h1, etc) 2. Notice which is doing specific things 1. don't spply to h1, rather to specific class 2. add a class to h1 called big-heading 3. create section Headings in css file and put h1 styles there. 3. All headings have same font, etc. 1. multiple selectors: h1, h2, h3, h4, h5, h6 { font-family: "Montserrat-Bold"; } 1. h2 styles 1. give h2's specific classes: 2. .price-text, font-size: 3rem, line-height: 1.5; 3. .big-heading, same 2. h3 styles 1. add .feature-title, for font-size 3. cta-heading turns out to be the same as .big-heading 1. add .big-heading to cta heading 4. text-align: center --ctrl f shows we used it 7 times 1. best to make the entire body text-align: center 2. But keep the one inside the media query 5. Regularly save and refresh and check that nothing changed 6. padding: 7% 15% --- used 4 times 1. change to .container-fluid 2. add container-fluid class to each item we used that padding for 1. don't even have to overwrite, just append it inside the quotes after what's already there. 2. delete all the extra stylings 3. pushes down our navbar 1. inspect 2. what should we do? 1. combine styles 2. make .container-fluid to have padding: 3% 15% 7% but also target the #title .container-fluid { padding: 3% 15% 7%; } Best way is to refactor as you go along so you don't have to have a huge refactoring session later. Next lecture: Advanced CSS - Combining Selectors Pick & Mix Selectors 1. Multiple Selectors - combine selectors using a comma (don't need a space but helps with readability) - h1, h2, p {color: red;} - most common for html elements 2. Hierarchical Selectors - selector1 selector2 {} - #title .container-fluid {} - targeted the .container-fluid class that's inside a div with id #title - spacing is important, different with the multiple selectors - read right to left - very important -- parent child {} - div h1 {} - h1 that's inside of a div (too broad though) - so we use the class name - more common: .container-fluid h1 {} - onlythe h1's within the parent with class container-fluid 3. Combined Selectors - no spaces - selector1.selector2 {} - selector1#selector2 {} - h1#title {} - have to occur in the same element - left to right - does not work: div#title {} - what's the difference? - open codeply 1. no bootstrap framework <div class="container"> <h1 id="heading" class="title">Hello world!</h1> </div> <div class>"container-fluid"> <h1 class=>"Good Bye World!</h1> </div> .container .title { color: red; } this colors only Hello World red if you delete the space, it's looking for both classes in the same element .container.title {} with no space doesn't work h1#heading {} targets all of the h1's that have #heading h1.title {} targets all the h1's that have a class title (will affect both hello and goodbye) Angela stresses how important it is for refactoring and readability: try to add new combinations instead of adding new classes. Next Lecture: Refactoring our Code Part 2 Continuing now with combined selectors 1. repeated pattern: background with opposing text-color - identify each section with white background - add class: white-section to each - identify each section with colored background - add class colored-section to each - add styles to these two selectors in CSS - #testimonials is slightly different - delete the repeated part (white text) - over-ride the background color by applying background color to the ID - ID is more specific so it will override - CTA section gets deleted - even if you have a combined selector, you can specify styles that you would originally specify only for single selectors - #title {something} - #title .container-fluid {something} - just add it to #title .container-fluid{} Next Lecture: Advanced CSS - Selector Priority have to call it here for today. didn't take some other screenshots I should have -- just realized the latest one was at around 4:15pm. I went until 5:30pm or so. |
|
|
|
|


Displaying 1-4 of 7 results.
February 12
Successful
Success
Success

A-Run-for-Joey
- Referee approval report
joshmrallen
- Committed user success report
February 11
Successful
Success
Success
A-Run-for-Joey
- Referee approval report
looks like this is a done deal.
joshmrallen
- Committed user success report
Once this particular commitment is done, I'm scheduling another one that end in 18 days which should be enough time to finish it. I drastically mis-calculated the length of time I'd need to go through this entire online course.
But it's been extremely enlightening so far and I'll definitely be able to complete it in another 2 weeks or so.
February 10
Successful
Success
Success
A-Run-for-Joey
- Referee approval report
joshmrallen
- Committed user success report
February 9
Successful
Success
Success
A-Run-for-Joey
- Referee approval report
Josh,
Since you proved consistency. I will report this as a success in hopes that you will continue this ASAP.
joshmrallen
- Committed user success report
.